In this review we will look at Akko ACR TOP 75 – the company’s first keyboard to adopt a south-facing PCB
By now we have tested several Akko keyboards. For the first time, however, we are faced with a “kit DIY“. In case you didn’t know it, companies specializing in keyboards (like this one) do not only offer pre-assembled models, ready to be used, but also single components to compose your own 360-degree keyboard.
Akko ACR TOP 75 is, in fact, one of these kits. Among its peculiarities we can mention the body made entirely of acrylic and the presence (for the first time in an Akko keyboard) of the south-facing PCB. What does all this mean? Well, you will only find out in the course of the review.

Unboxing – Review Akko ACR TOP 75
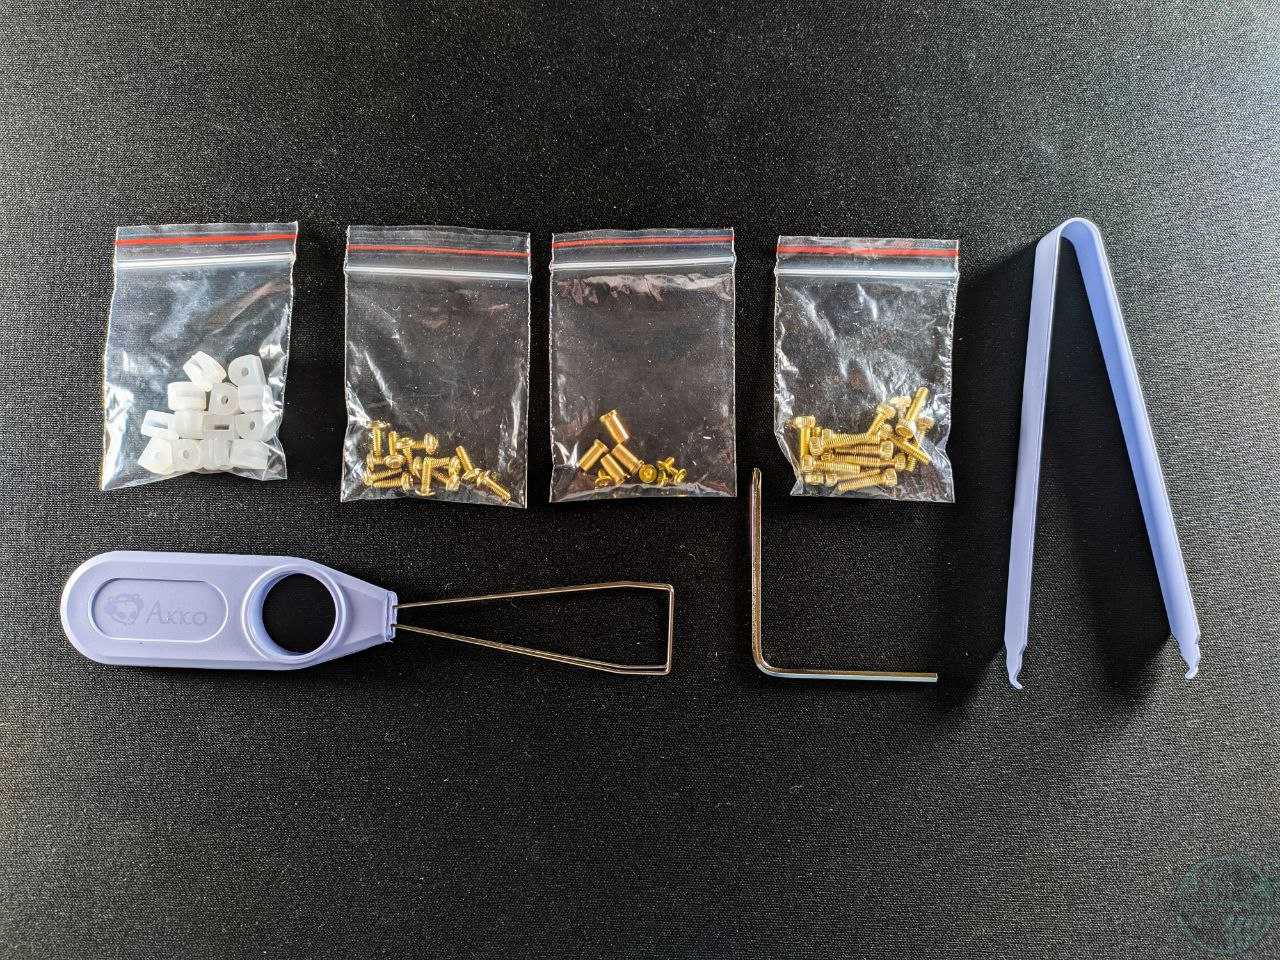
Let’s first look at what the sales box contains. In the various compartments, divided by a thick sponge, we find the various components, the screws, the stabilizers and the instruction booklet, as well as a USB-C to USB-A rubber coiled cable.
Everything is really well protected, as well as by the black sponge also by the bags that incorporate the individual sections. The keyboard is divided into two acrylic parts that make up the case. Then we have the PCB, the switch pad, a silicone shim and a brass plate. The material that will be used to fill the case is always silicone. Let’s now pass to the assembly of this Akko ACR TOP 75.

We assemble the keyboard – Akko ACR TOP 75 review
Putting all the components together is anything but difficult, also thanks to the video tutorial made by the company itself. Essentially we will have to compose the plate by anchoring the PCB to the brass plate, not before having inserted the stabs. Then this will be fixed to the upper part of the acrylic case with the Phillips screws. Once this is done, all that remains is to connect the PCB to the USB-C port and join the acrylic bottom to the silicone shim inside.
Akko provides us with a small tool that will be used to screw the screws supplied in the kit. Although the small Allen key is functional, the Phillips screwdriver is a little less so and, therefore, we advise you to equip yourself with precision screwdrivers. Furthermore, we would like to warn you that, in case you are interested in this kit, you will not have to tighten the various screws to the maximum in any way because you could risk irreparably damaging the acrylic.
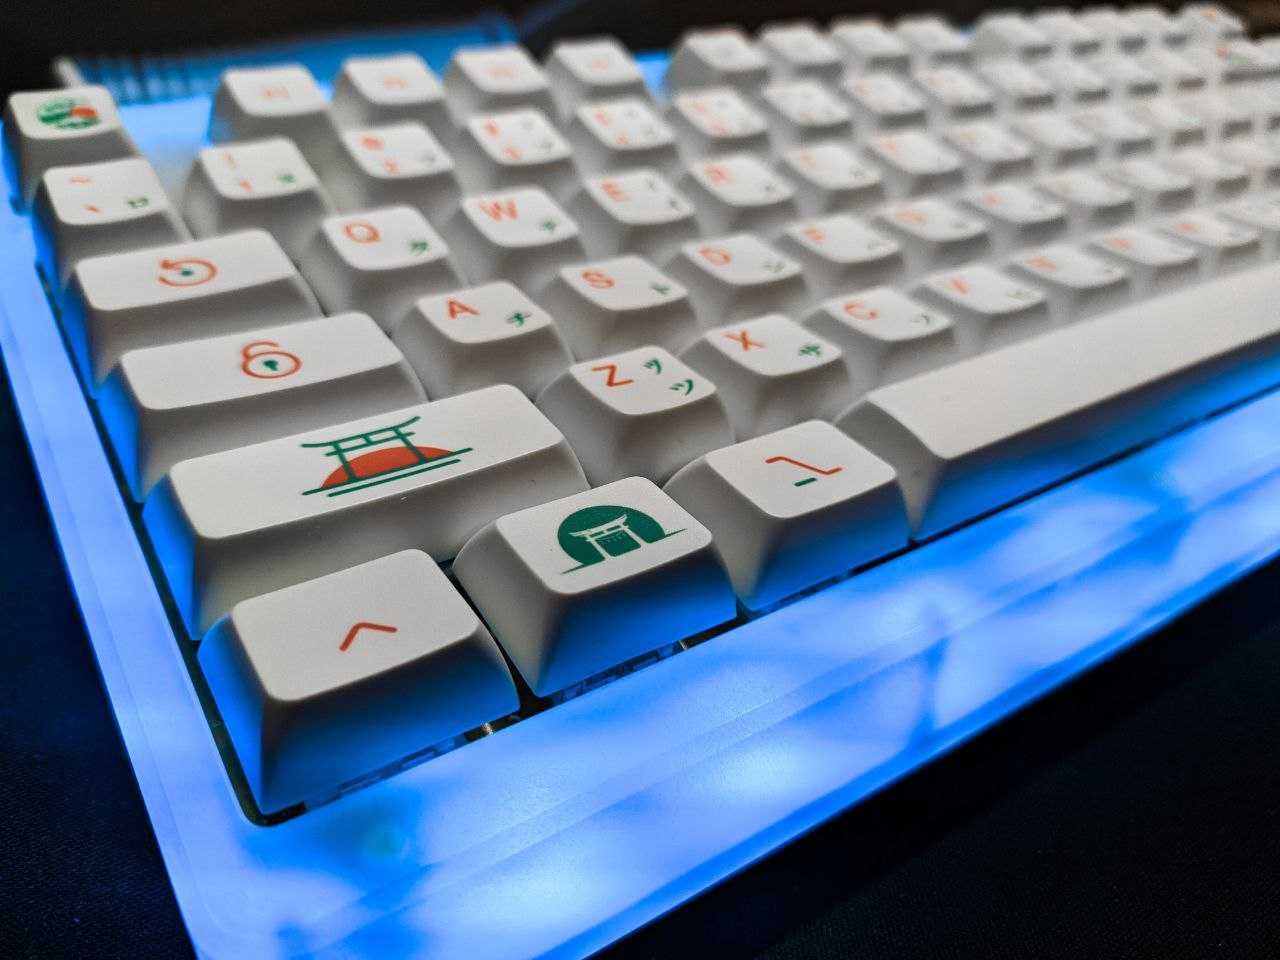
Once the assembly of the various components has been completed, we will only have to install the switches and keycaps. In this case, we used Akko’s “CS Crystal Switches” and “Red Fuji Keycaps”.
What does south-facing PCB mean?
Until now Akko has only offered north-facing PCB keyboards, but what does it mean and what is the difference with south-facing PCB? Basically, the most obvious difference concerns the LEDs which, as the name implies, face south or north. This also translates into the installation of the switches which, of course, happens in reverse.
Since the most common keycaps are the “Cherry Profile”, in a keyboard with a PCB facing north it happens that these collide with the switch. A south-facing PCB keyboard avoids this problem, making the keyboard much more versatile and suitable for practically all types of keys. The downside is that while on a north-facing PCB the LEDs will create a better effect, on a south-facing PCB the lighting will be more visible and “annoying”.
Feeling and use – Akko ACR TOP 75 review
The feeling we got when writing about this Akko ACR TOP 75 is unique. The very solid and totally acrylic body does not have its pros only from an aesthetic point of view but we start from the latter anyway. With a matte finish reminiscent of an ice sheet, the keyboard might just be exposed, but not using it would be a real shame. Regarding thelightingthis is divided into two separate parts. We have the PCB lighting and a kind of ring that circumnavigates the contour of the keyboard. These can be managed separately through the “Akko Cloud Driver“ program. Speaking of the aesthetic goodness of the LEDs, those placed on the PCB did not drive us crazy since they are visible, while those in the outline manage to create a fully successful effect. Obviously, much of the credit is also due to the material of which the keyboard is made.
Speaking now of feeling in writing and use, we fully promote this model. First of all, it is a heavy product (1.23 kg) that absolutely does not give the idea of being fragile or poorly made. Also with regard to the PCB, the screws that serve to anchor it fix it in an optimal way and it does not flex in the least. This, combined with the fact that there is a silicone plate in the bottom, manages to return a dark and very pleasant sound.
The switches we used are the linear “CS Crystal” made entirely of translucent plastic that favors the propagation of LED lighting. These turned out to be great, just like the “CS Crystal Blue” tested in the last review. In our build we have installed keycaps with JDA profile that have completely convinced us. Let’s talk about the “Red Fuji” which, in addition to being very satisfying from an aesthetic point of view, are excellent in terms of writing. The only caveat goes to the spacebar stabilizer which, while the others are very quiet and pleasant to hear, is quite noisy.
Let’s sum it up
The review of this “Akko ACR TOP 75” DIY kit ends here. The keyboard convinced us almost completely. The only side that needs an improvement is certainly the stabilizer sector. Apart from this, the model we tested is perfect for those looking for an aesthetic of this type without wanting to spend a fortune and without giving up an excellent feeling of use.
The kit is available on the official website at a price of € 149.93.
Points in favor
- Excellent materials
- Led sector passed with flying colors
- South-facing PCB
- Hot-swap technology with the possibility of inserting 5-pin switches
- Extremely beautiful
Points against
- The stabilizers did not fully convince us


Leave a Reply
View Comments