
“But what do you do with it?”
It’s one of the questions we hear most often after installing Iotty smart Plus switches. And it’s also partly our fault that, when explaining what they are and how they work, we always start by emphasizing the support for voice assistants.
However, there is a reason if we start from this element: it is the most evident interaction with this product. Yelling “Alexa, turn on the living room light” is what we notice the most during our day, and this is because in reality, once configured, you will barely notice their presence. In fact, Iotty’s switches integrate perfectly with your home and with your routines. There are but they are extremely discreet.
But let’s go in order.
Switches but not only
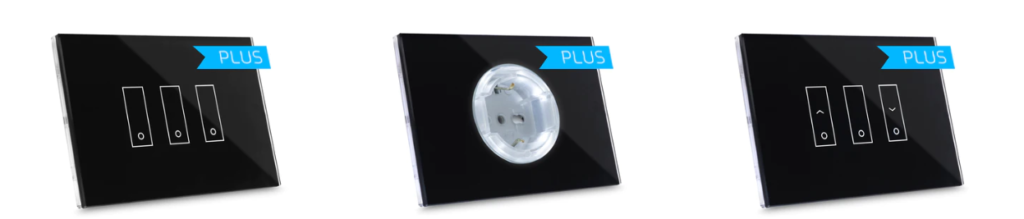
We talked about “switches” to simplify but in reality Iotty’s Plus line consists of three different products:
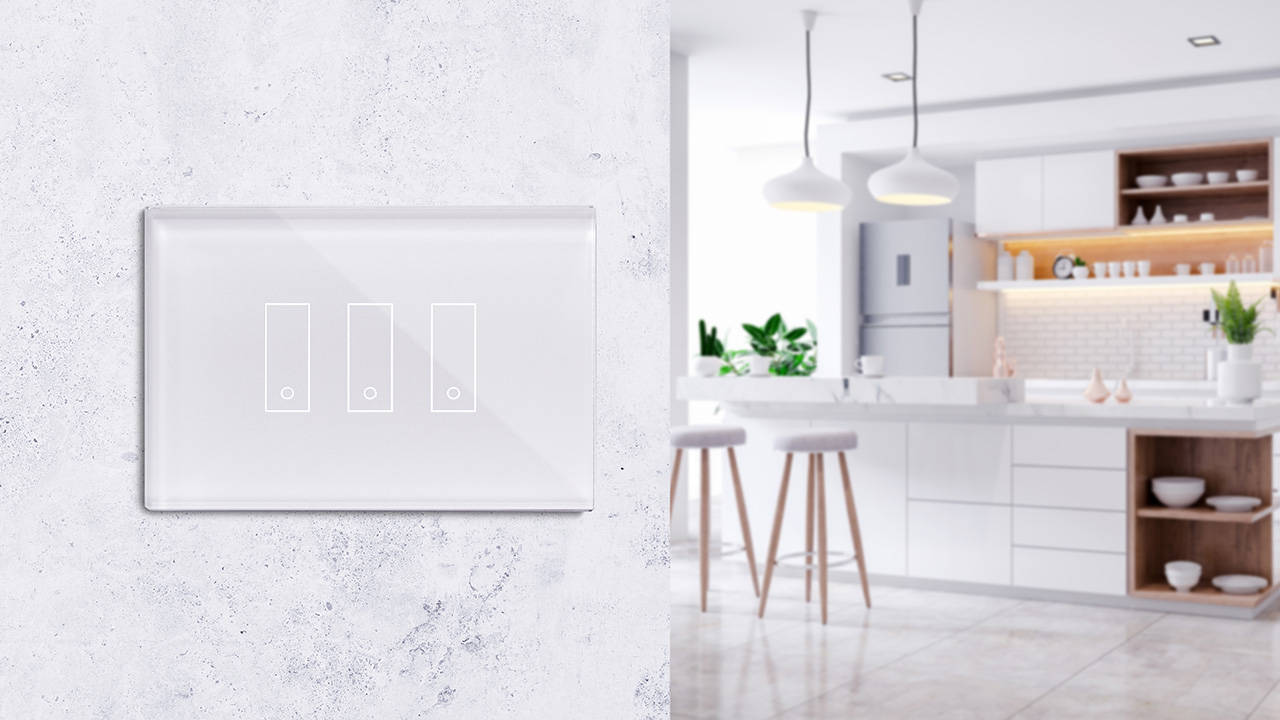
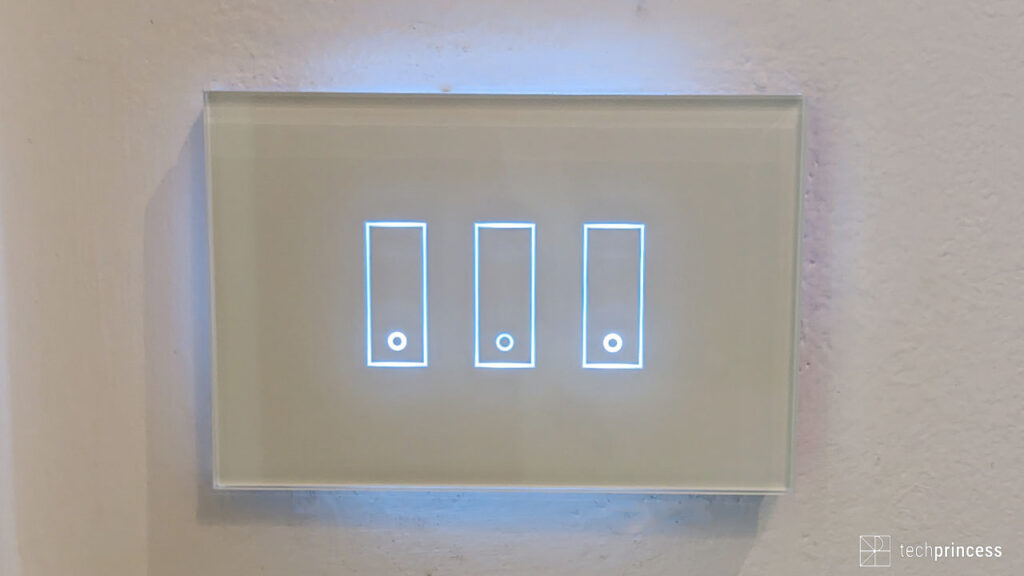
- The i3 Plus, which they actually are switches. Or rather, a plate made up of 3 switches that are perfect for lights and gates;
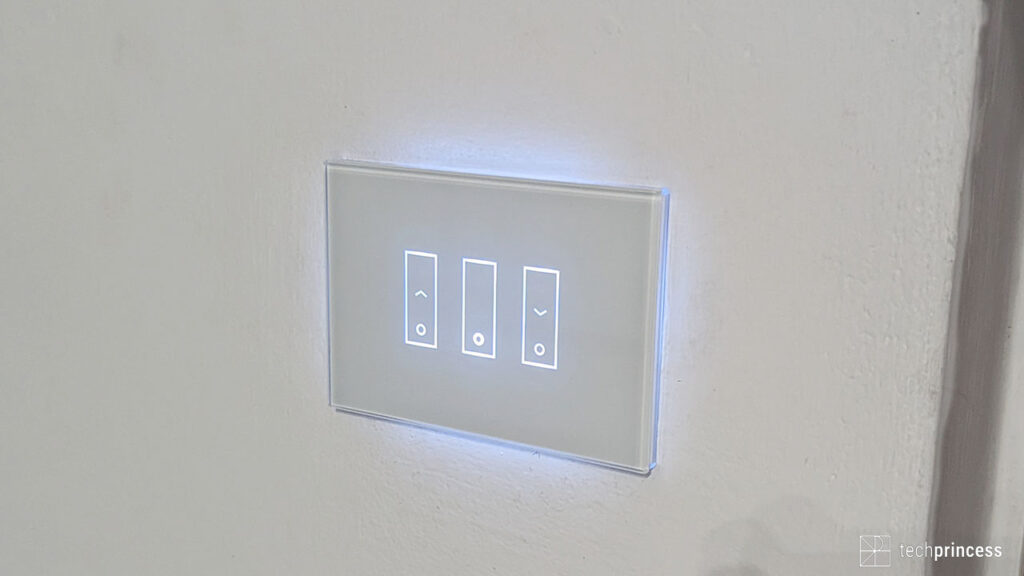
- The i3s Pluswith the plate which always has 3 switches but two of them serve to raise or lower curtains and blinds;
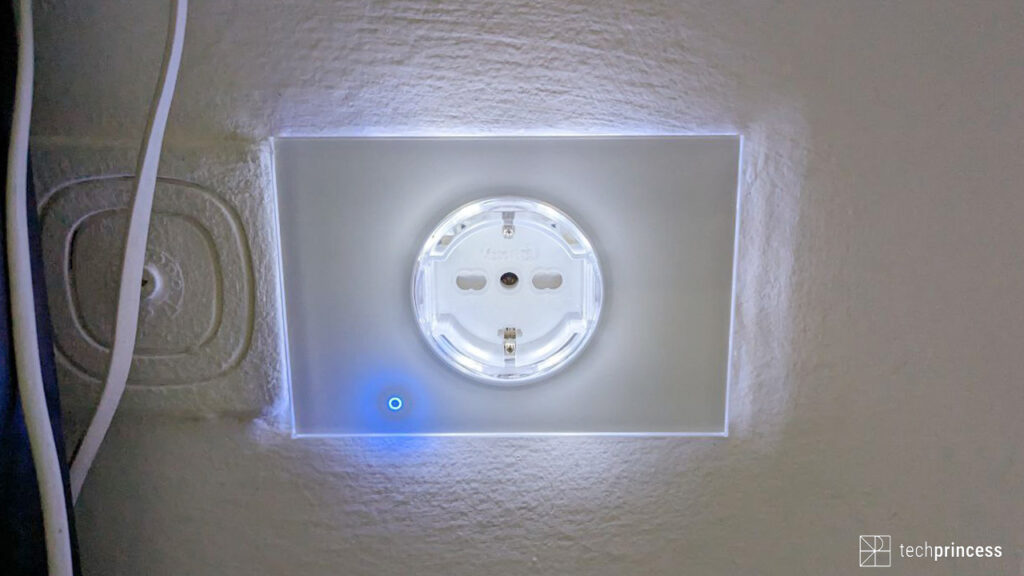
- the OIT, a smart schuko socket.
You don’t necessarily have to have all 3 and you don’t necessarily have to change all the house plates. This means that if you want to start experimenting with Iotty starting from just one product, you can.
There is one thing you need to consider though: the more Iotty plates you have, the greater the customization possibilities.
What the heck does that mean?
Among the options of Iotty Plus there is the possibility of associating the key to what is called “wireless switch”. Translated into a nutshell, it means that a button on the plaque in the living room could, for example, be associated with the light in the cellar or with the opening of a gate. Provided, of course, that the light in the cellar or the gate is already associated with an Iotty plate.
Install Iotty: with or without the technician?
Ideally you could install Iotty Plus yourself.
To connect the plates, the Phase wire, the Neutral wire and a little basic knowledge of the electrical system are enough; Earth is added to the OIT socket.
Our suggestion, however, is to rely on an electrician, in this way you make sure that everything works correctly and in case of difficulty, or simply of configurations different from the one provided by the manual, you are in the company of a professional who can help you find the correct solution.
And it is not a random example. We have chosen to rely on the technician who has given us excellent advice for associating the right keys with the right functions.
Why this?
First of all because we installed two plates and a socket, so we didn’t modify all the switches in the house but together we found the most suitable ones to exploit the specific functions of Iotty.
Secondly, the plates that we replaced had two switches against the 3 of Iotty i3 Plus so we associated only the external buttons, leaving the central one free to become, as anticipated, a wireless switch.
An electrician isn’t the only thing you’ll need during installation. You’ll have to download it too Iotty’s application, app that will help you associate all the products with your account, connect them to the Wi-Fi, indicate in which room your Iotty Plus are located and then establish the function of each single switch. Not to mention that this is where you control the situation from.
The process is not very immediate because there are several steps but it’s all very guided so yes, it will take a few minutes but you won’t have to go crazy, just read carefully what the software asks you to do.
Iotty Plus review
Aesthetically, practically nothing changes compared to the previous model. So we have 3 touch keys on tempered glass, glass which in our case is White but which you can also find in the Black, Blue, Sand and Gray variants. Five options that help you find the right variant for your home.
The same thing goes for the OIT socket, which it has a tiny touch button dedicated to turning the socket on and off.
All three products are backlit by a pleasant white light which, however, we advise you to lower. In fact, by default we are around 75% of the brightness, a level that does not disturb during the day but at night can become a small beacon in the dark. After a couple of days with the corridor unusually lit, we decided to keep it at around 25%.
What has changed?

We said that the design has remained unchanged but in reality there are both hardware and software innovations that improve and enhance the user experience.
First of all we have the integration of brightness, temperature and proximity sensors that help you create new scenarios and new automations.
And, mind you, they are not the same thing.
Lo scenario it’s simply a set of commands that run together when you activate it. For example, we have “Darkness in the living room” which reduces the brightness of the socket and plate in the living room to a minimum for when we want to watch a film in the evening.
L’automation works on the basis of the “If this… then that” rule. A simple example: on Friday at 21.00 turn off all sockets. So save electricity if you usually go away on weekends.
There are then hardware optimizations such as improved glass plate docking, automatic touch recalibration and long touch reboot of the plate. All small things that make the daily use and installation of the product easier.
The new generation of Iotty products also supports multi-house management in case you have more than one home with these products, there are real-time energy consumption, the high-five command and much more.
Iotty Plus review: the app
We arrive at the beating heart of the system because after all, the software is the element that allows you to manage the Italian company’s smart switches and sockets.
L’applicationavailable on both Android and iOSpredicts 5 main tabs: Scenarios, Automations, Devices, Statistics and Settings.
We have anticipated the first two a little: from here you create – as the name suggests – the scenarios and automations that make your life easier, also allowing you to reduce waste and, above all thanks to the sockets, save a little on your bill .
If you’re terrified and don’t know where to start, don’t worry because the app already suggests a series of scenarios and automations that can be useful to you.
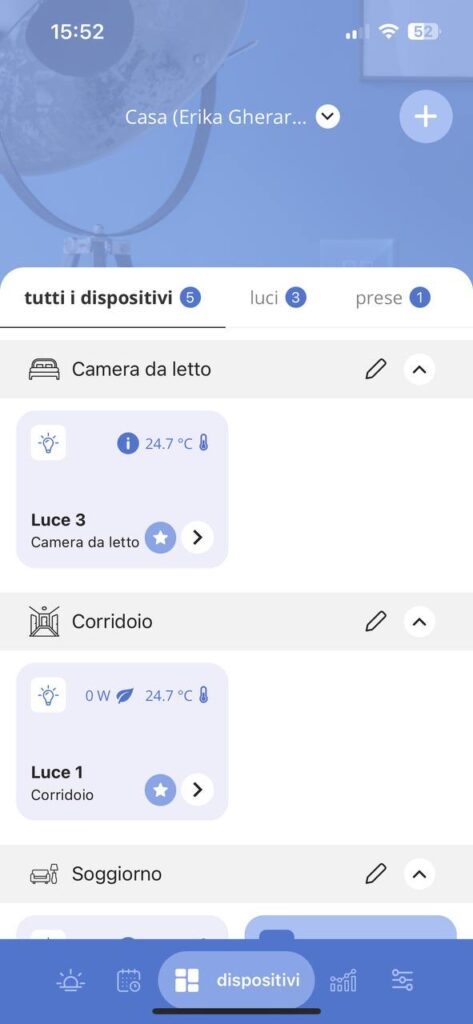
He tab Devices summarizes switches and sockets installed dividing them by rooms. Or you can select lights only or outlets only.
From here you can see right away what is on or active, displayed the temperature measured in the house in the case of switches and the current energy consumption of the individual outlets.
By clicking on the small arrow associated with each element, you can access other options.
Here, before telling you which ones, let’s make a small but necessary digression: the arrow is very small and in the specific case of the socket it is a moment to deactivate it instead of going into the settings.
In our case this turns into a small drama every time because, due to logistical needs, we have replaced the socket to which, among other things, the router is connected with Iotty OIT, which means that by deactivating the socket we lose the network connection and therefore we cannot remotely restore everything.
Ours is an undoubtedly unusual situation but, with the wrong touch, you could disable the robot vacuum cleaner at home, a voice assistant, a television… Nothing dramatic or unsolvable but, in our opinion, it would be more convenient to study an interface slightly different to avoid these little accidents.
But let’s go back to the settings.
In the case of switches you can decide the type of key Between:
- On/Off switch, then the traditional one;
- Buttonwhich is used for gates because it gives a short and single impulse;
- disabled, if you don’t want to use it;
- wireless switch, therefore associated, as we mentioned at the beginning, with another Iotty switch. This allows you to really take advantage of all the switches, even those additional to the plate and the original connections. Then, if you really don’t need them, in the box you will find some black cards to obscure the keys that are not associated with anything.
You can also define the categoryindicate the room, indicate the wattage of the light bulb (or bulbs) or go to the settings of the whole plate; defined here the intensity of the backlight and enable the feature Give me five. In fact, by placing your open hand on the plate, you can have the system execute a specific command. All in all, it’s like having an extra touch key.
As for the Jack you can define its mode by choosing between Normal or Child Lock which, in fact, disables the socket. Again choose category and room or go to the whole class options for decide backlight and touchscreen sensitivity.
An important note: switches, sockets and plates have names that you can change. Choose them well because then they help you both with the automations and scenarios and with the voice commands. In fact, we remind you that Iotty Plus supports Amazon Alexa, Google Assistant, Siri and even the SmartThings app by…