
The “Kyoto Drift” is a problem that can be solved: here’s how to prevent the Nintendo Switch Joy-Con from slipping, even permanently
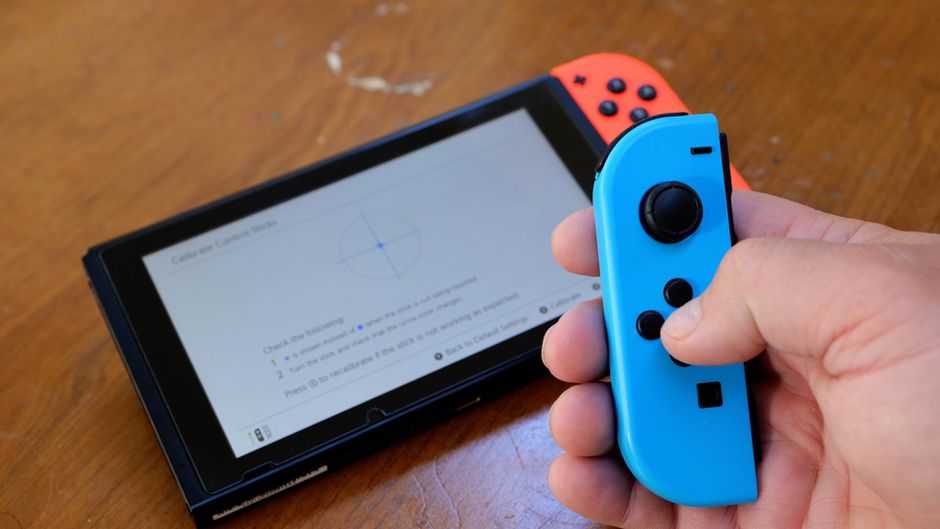
Since with the new year comes (or at least it should) also a new life, we have put among our good intentions that of understanding how to fix Joy-Con Drift on our Nintendo Switches. We doubt the most famous hybrid console controversy needs any introduction, but we’ll gladly repeat it in case. In short, after an unspecified period of time (a matter of months or years in some cases, or hours for less fortunate players), the analog levers of the controllers tend to slip. It happens with a little bit of any analogue lever, but the Big N’s newest child seems particularly affected.
Which is a shame, considering that in terms of functions and hardware these are not only the most versatile controllers ever designed by the Kyoto giant, but the most versatile in gaming as a whole (rhyme unwanted). It goes without saying, of course, that their price is adjusted accordingly, with an average of 45 euros for the single one and 80 for the couple. We will explain the possible (and variables) cause slippage (minigames permitting), since when a controller including gyroscopes, wireless communication and anything else starts to freak out, it’s good to know where to put your hands. As long as you feel like it, of course!
“Have you already tried to turn it off and on again?”
Let’s first try to understand how to deal with the Joy-Con Drift, since Nintendo itself still does not hint at wanting to definitively solve the Switch’s biggest problem. First of all, what does the slip consist of? It is about unregistered inputs when, basically, there are none. In other words, therefore, just when we see our Animal Crossing: New Horizons avatar move very slowly on its own (to give an example) with an almost mocking effect, it is the work of the slip. If the mere idea of seeing a character (or a shot) moving around on their own bothers you, you are in good company.
The trade press (and not!) Talked for a long time about the class action (collective action, ed) with which consumers have filed a complaint. Nintendo officially responded in July 2019, inviting us to appeal to customer support. Meanwhile, the various theories on the cause have overlapped, from the wear of the levers themselves to the dust between the circuits. The latter seems very plausible, but while a controller benefits from hygiene it is not a master key for proper operation. For this reason, there are more ways of dealing with the problem. Let’s see which ones.
Land of persimmons – how to solve Nintendo Switch Joy-Con Drift
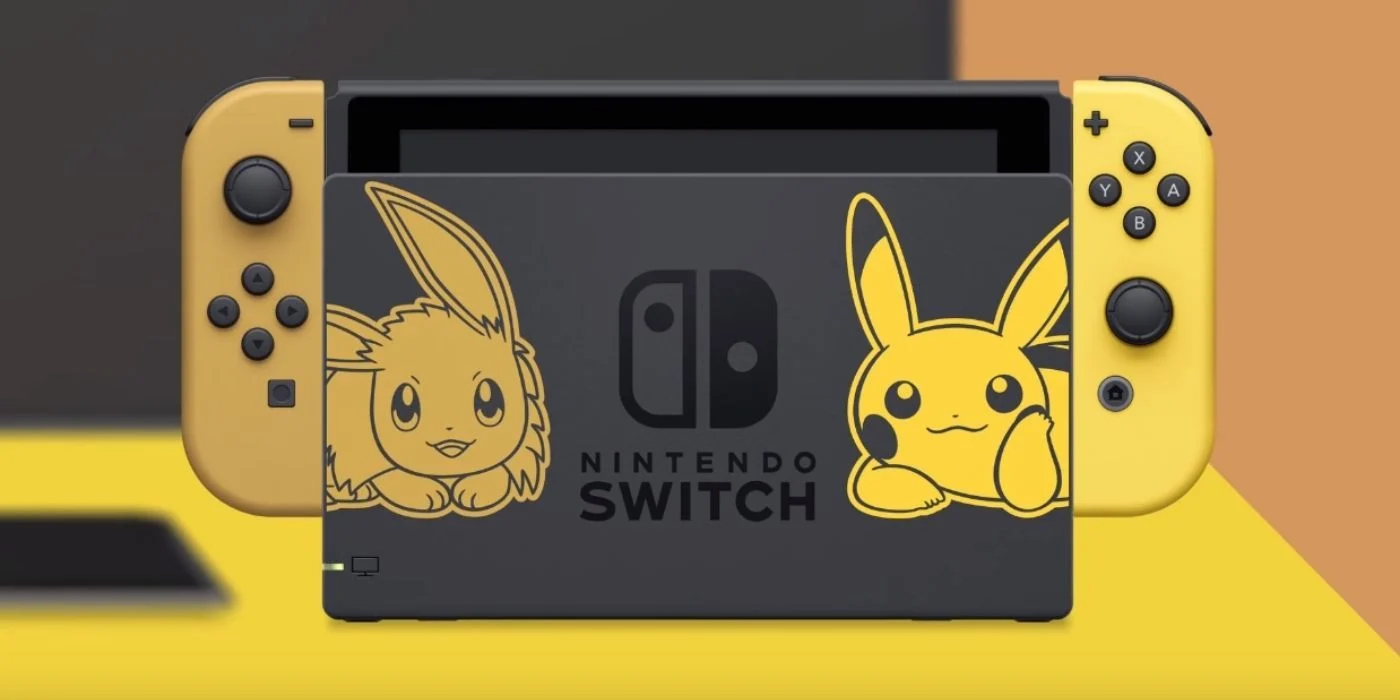
Since this is a widespread problem, Nintendo has offered to fix the Joy-Con Drift for free, having also apparently figured out how to fix the new Switch controllers. For now, this is the only “official” way to settle this problem, but there are two quibbles. The first (as well as the most understandable) is replacement in case of repair impossible. The Grande N itself may not necessarily be able to repair a controller, in this case opting for a replacement; there is, but if the lever concerned is part of a limited edition (the dark red of Super Mario Odyssey; below, the ocher and yellow of Let’s Go, Pikachu! and Eevee !; the black with the Super logo Smash Bros. Ultimate), be prepared for the worst.
The second and most important thing to keep in mind is the economic side. In practice, far repair i controller for free it is possible, but depending on where you are, conditions may vary. Where the Japanese giant has been harassed by consumers (as in France, where the console won the unenviable “award” for the most fragile product of 2019), repairs are free regardless. As for the Bel Paese, however, the conditions are the same as always: if (and only if) the product is in warranty and a receipt can prove it, the repair does not require transactions.
Calibrating the levers – how to fix Nintendo Switch Joy-Con Drift
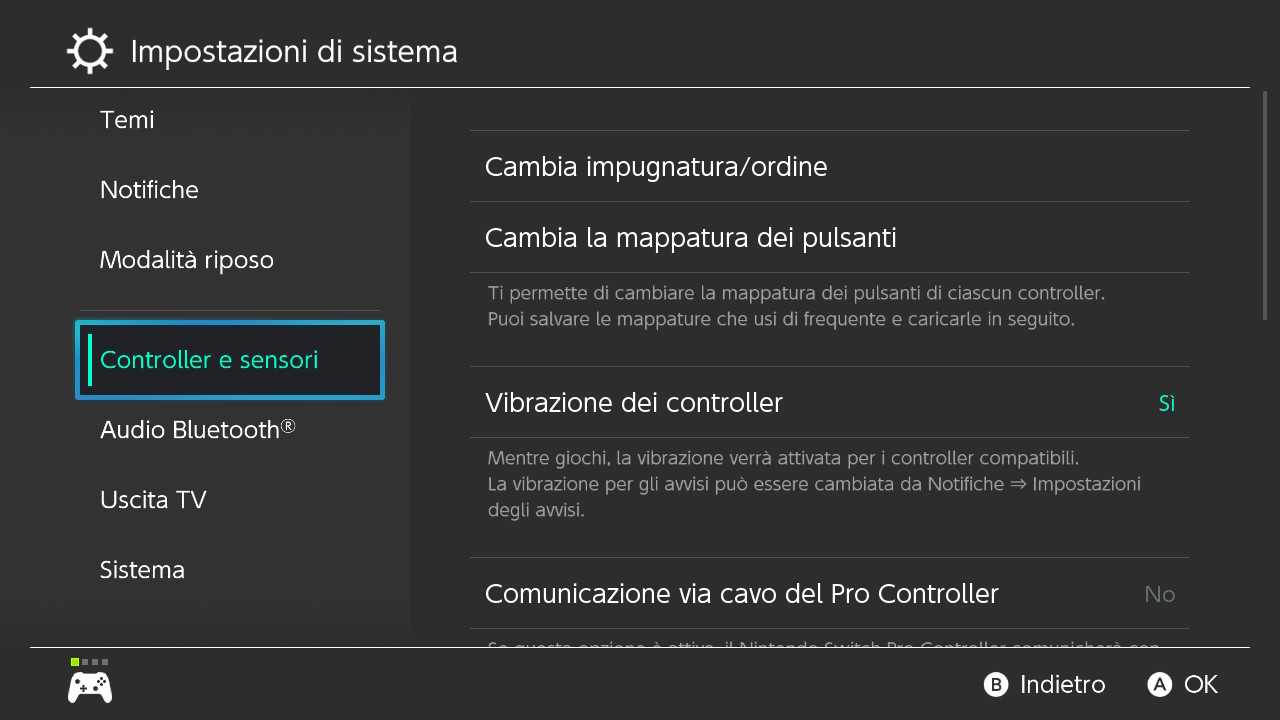
The lever calibration it’s not really a solution in and of itself, but doing it is definitely common sense. To perform it, you will need to head to the settings menu of the console. You can find the relevant icon among the lowest in the Home menu. You should recognize it easily, but if you have the console recently (and if so, sorry to be here already) it is the wheel. At this point you should find several items in the drop-down menu on the left. Choose “Controllers and sensors”, look for the item “Calibrate the sticks” (image below) and follow the instructions that will be provided on the screen.
Go back to this step whenever you want tESTING the analogue levers and their correct functioning. This applies to repairs done by Nintendo itself, to any new Joy-Con you buy (it’s an option, albeit an expensive one), to Pro Controllers (which will also suffer from slippage sooner or later) or, if you’re particularly brave. , when you decide to fix them with your hands. There is another step to be performed in tandem with this, however, which also wants its part: it has an equal importance to this, and as such it can (sometimes) solve the problem.
Update and clean controllers – how to fix Nintendo Switch Joy-Con Drift
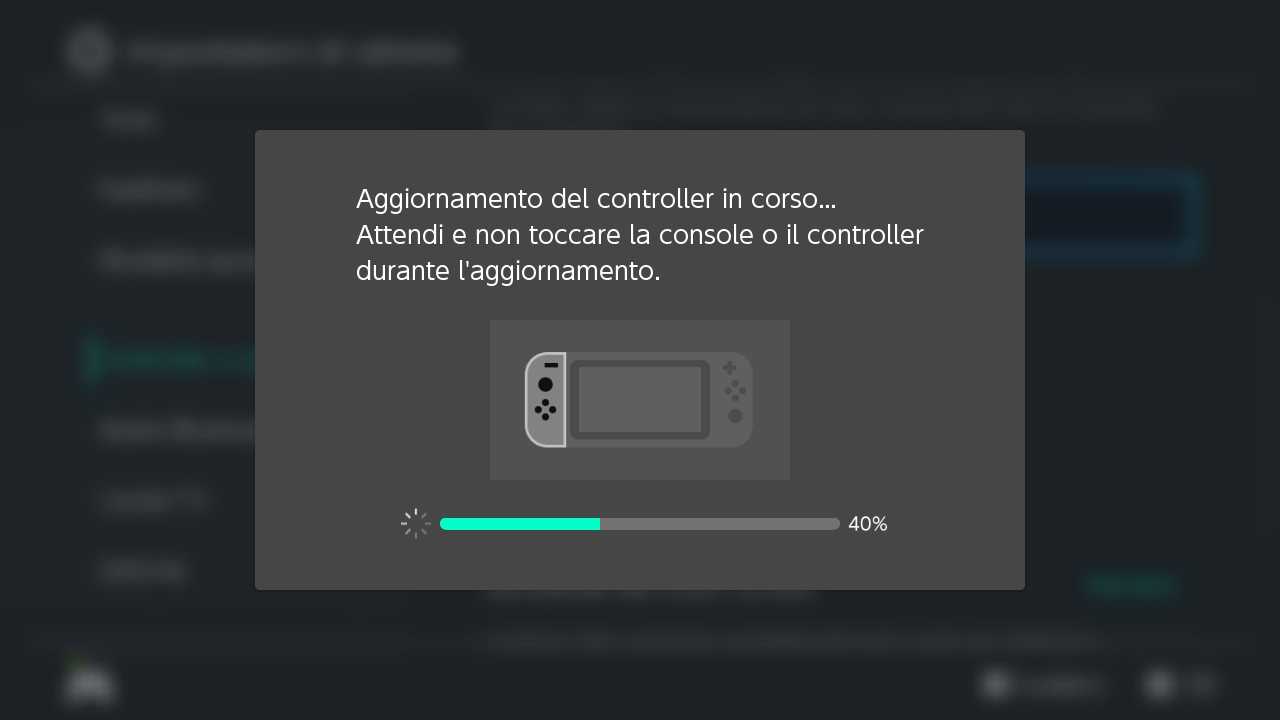
Believe it or not (for early players like myself, it’s hard for sure), controllers can be update. It must be said that your own Nintendo Switch may remind you of it, but in case you can head to the same menu we showed you above. The operation itself takes a few minutes, and in the case of the first Joy-Con models this operation solves some connectivity problems. And with that concludes the options for solving problems at the software level. In the (more likely) case that the problem is really a physical one, you have to start with the cleaning.
Sometimes dust can settle in the small gap between the analog sticks and the controller case. This, again, happens to a little bit with any controller, regardless of the manufacturer of the console, and can affect not only the levers, but the buttons as well. In any electronics store you should be able to get yourself a can of contact cleaning spray. Used beforecompressed air to clean the base of the analog lever, perhaps with a straw to better guide the flow, and then recalibrate the levers (previous section). If the air is not enough, repeat the process with the spray.
The best way to use cardboard – how to fix Nintendo Switch Joy-Con Drift
If you’re here because you can’t find your receipt anymore (or you’re out of warranty in general) and don’t want to shell out anything for the repair, though, then you’ve likely heard of the trick discovered by VictorSTK. Be aware, before proceeding further, that in the event that you are still within the period covered by the guarantee, you are about to cancel. That said, we will immediately reveal the mystery: it is possible, according to the youtuber, that the problem is only due to pressure which is less among the components. That’s all. To check this, try applying pressure with your thumbs to the base of the compartment where the lever is inserted while sliding.
If the lever stops during the test, you have found the source of the problem. And if this discovery has left you astonished, wait until you discover the solution: to permanently apply the necessary pressure, once the controller is opened, just place some cardboard at the base of the lever. Yes: we did not say “paste”, but “support”. The video below shows everything you need to know (after a funny introduction artfully edited with a scene from Sonic The Hedgehog 2006). If you thought Nintendo Labo was the best use of cardboard with the Switch, that’s not it!
Tools of the trade – how to solve Nintendo Switch Joy-Con Drift
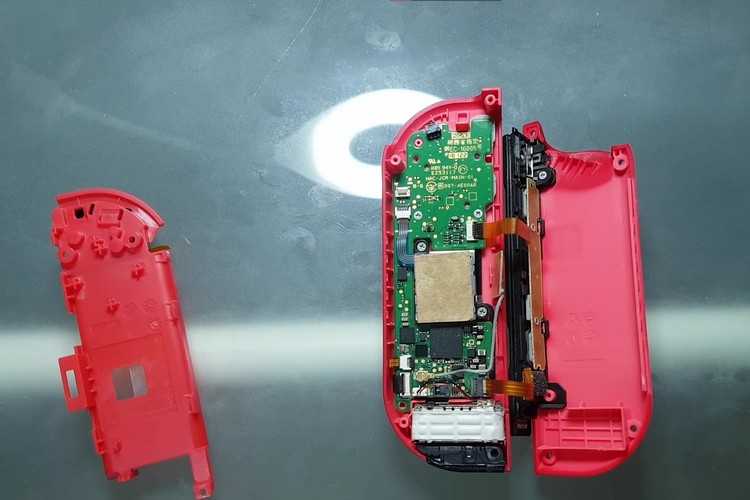
You will need to procure some tool more than your standard kit. In fact, since time immemorial, Nintendo has implemented uncommon screws to discourage do-it-yourselfers for the most diverse reasons, from the fight against piracy to otherwise preventable failures. You can get the necessary screwdriver (with a “three-pronged” tip) at any e-commerce site. The official name of this screwdriver, apparently, is “Y00 three-pointed screwdriver“(Y00 with two zeros). For the rest, the necessary tools are the usual ones: earwigs, spudger (inserter), tweezers and possibly anything the thickness of a pick for force disaster of some elements.
As for the cardboard, going haphazardly will make this complex videogame surgery operation useless. The recommended thickness is that of “five millimeters”, but to make things easier for you we would recommend that you use the cardboard of a business card. Ideally, printer paper can also be used, artificially generating the desired thickness by folding the piece of paper as needed. The key word here is “ideally”: it is not an exact science, but in general normal paper is (obviously) more subject to wear. And the last thing we want, here, is to have more dirt (because that’s what a stray piece of paper represents) between the components.
“Scalpel” – how to solve the Nintendo Switch Joy-Con Drift
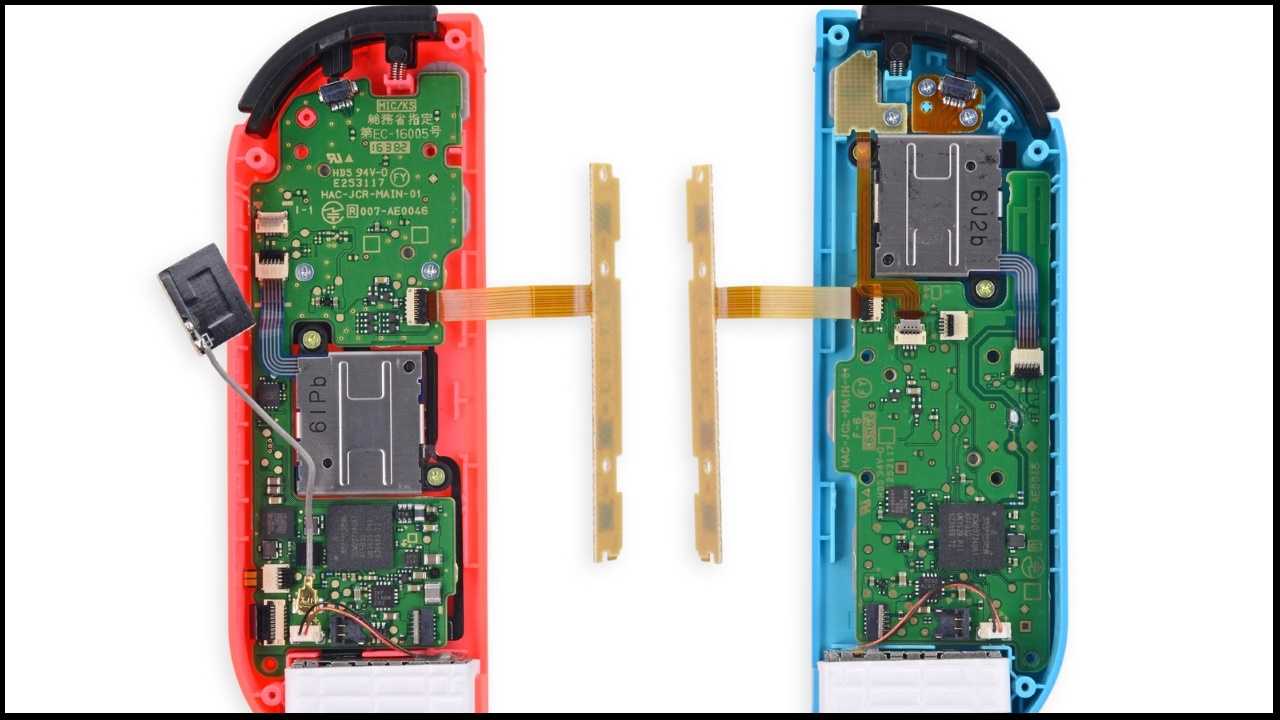
You may have wondered why to include tweezers among the tools you need. The size of the Joy-Con should speak for itself, but in reality there are some particularly difficult connectors that would require tweezers even on the good old “Duke” of the first Xbox. We allude to flat, which in simple terms are “ribbon” connectors designed to connect components on different ends of the controller. There are many electronic boards in a controller, and flat is used to connect them. Unfortunately, it happens that it is also the most part delicate of any electronic circuit (you can see them below, in the center).
Precisely for this reason, we recommend that you include a magnifying glass (and, ideally, a helper to hold it for you) among the necessary tools. We take this opportunity to finally point out that the two Joy-Con are different by design. We could limit ourselves to the more superficial differences, such as the positions of the keys with respect to the levers or the presence of the Home button only on the right one, but in reality the latter boasts one more difference. The right controller, in fact, not limiting itself to the already impressive technology of the left also includes an infrared camera. And this will give you even less room to maneuver.
All steps – how to fix Nintendo Switch Joy-Con Drift
We have prepared you enough about the eventualities you will face, and now is the time to list all steps to accomplish. Don’t be in a hurry: calm and cool are your best friends.
- Use …