
In this review we will analyze the brand new AKKO x MonsGeek M1 DIY Kit
We can say that this 2022 was “the year of custom mechanical keyboards”. In fact, on the pages of TechGameWorld.com, reviews of keyboards of this type have literally multiplied exponentially.
AKKO is one of the brands that immediately showed itself willing to let us test its pre-assembled machines. Obviously, however, like any self-respecting passion, even in the field of keyboards, once you start you never stop aiming high.
What we have the pleasure of reviewing in this article is a “DIY Kit”, i.e. a set for assembling a custom keyboard. Full name is AKKO MonsGeek M1 DIY Kit: a collaboration between the two brands characterized by a completely aluminum body and a “Gasket Mount” plate. To find out what it is, though, you’ll have to keep reading!
Unboxing – Review AKKO MonsGeek M1 DIY Kit
Let’s start, as always, from what we find in the package. In addition to the aluminum body which, in our case, is in the “White” color, we find some screws, a small Allen key, the cavo Coiled da USB-C a USB-A rubber, the “Screw-in” stabilizersstickers to carry out the so-called “Force Break Mod” and a larger sticker sheet to go for a “Tape Mod” under the PCB.
The keyboard arrives already assembled without, however, stabilizers. Akko has provided us, along with this kit, with its own switch “Wine Red” already lubricated at the factory. Now let’s move on to assembling the keyboard.
Let’s assemble the keyboard – AKKO MonsGeek M1 DIY Kit Review
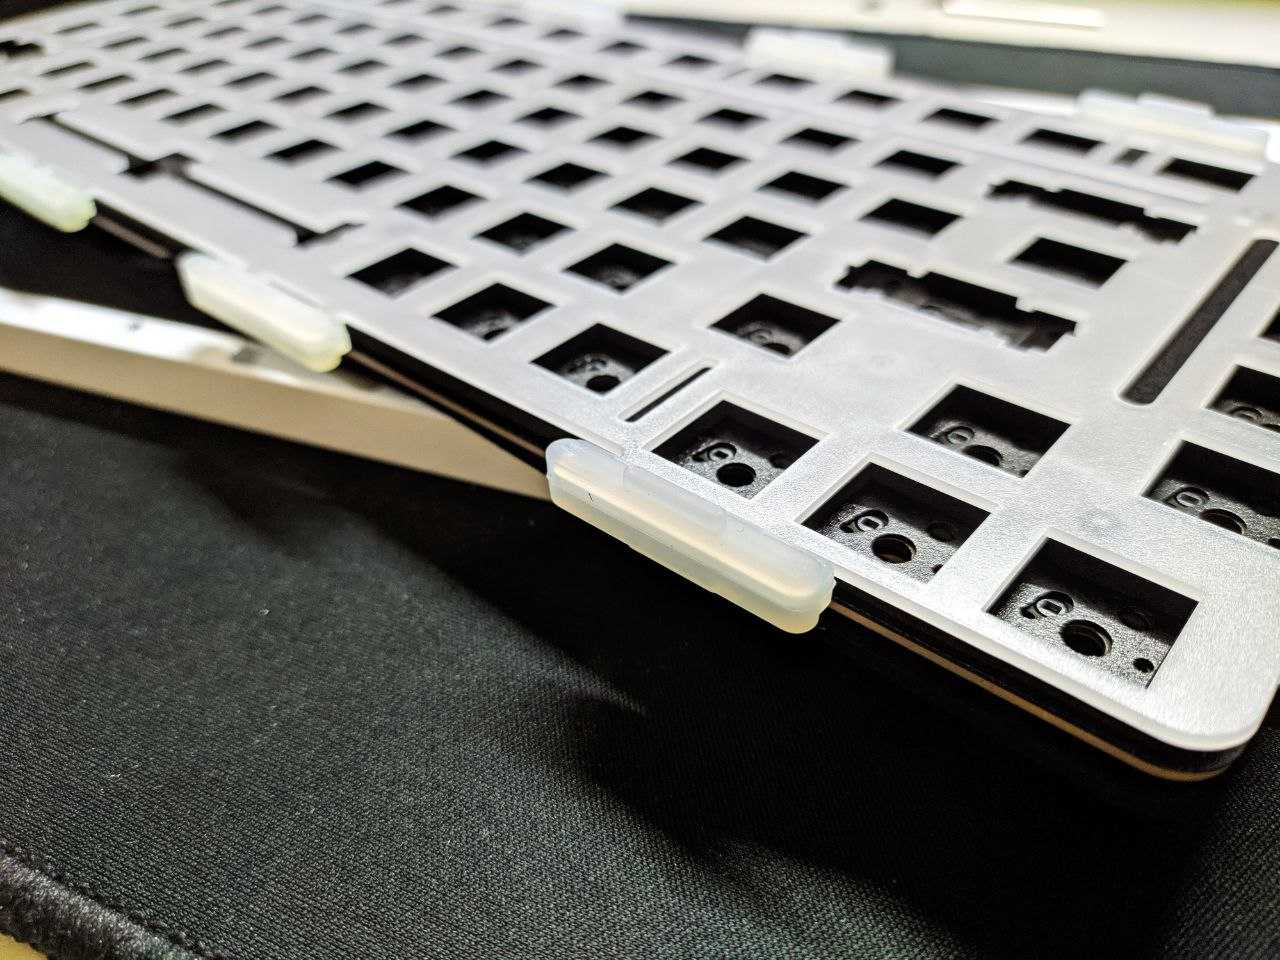
Putting the keyboard together is really a breeze. In fact, it is sufficient to unscrew the six screws on the bottom and disconnect the power supply to separate the PCB from the lower aluminum section. Once this is done, we can go and install the stabs and (if we want to) mod the keyboard. Being “Screw-in”, the stabilizers will have to be screwed to the PCB. One of the peculiarities of the keyboard is that of being “Gasket Mount“. This essentially means that the plate where there is also the PCB fits between the two halves that make up the case. In a nutshell, the plate remains practically suspended and on the sides there are silicone gaskets that guarantee better adherence and a cleaner sound. The switches are also installable once the keyboard is fully assembled, as are the keycaps. The PCB allows you to install both 3 and 5 pin switches.
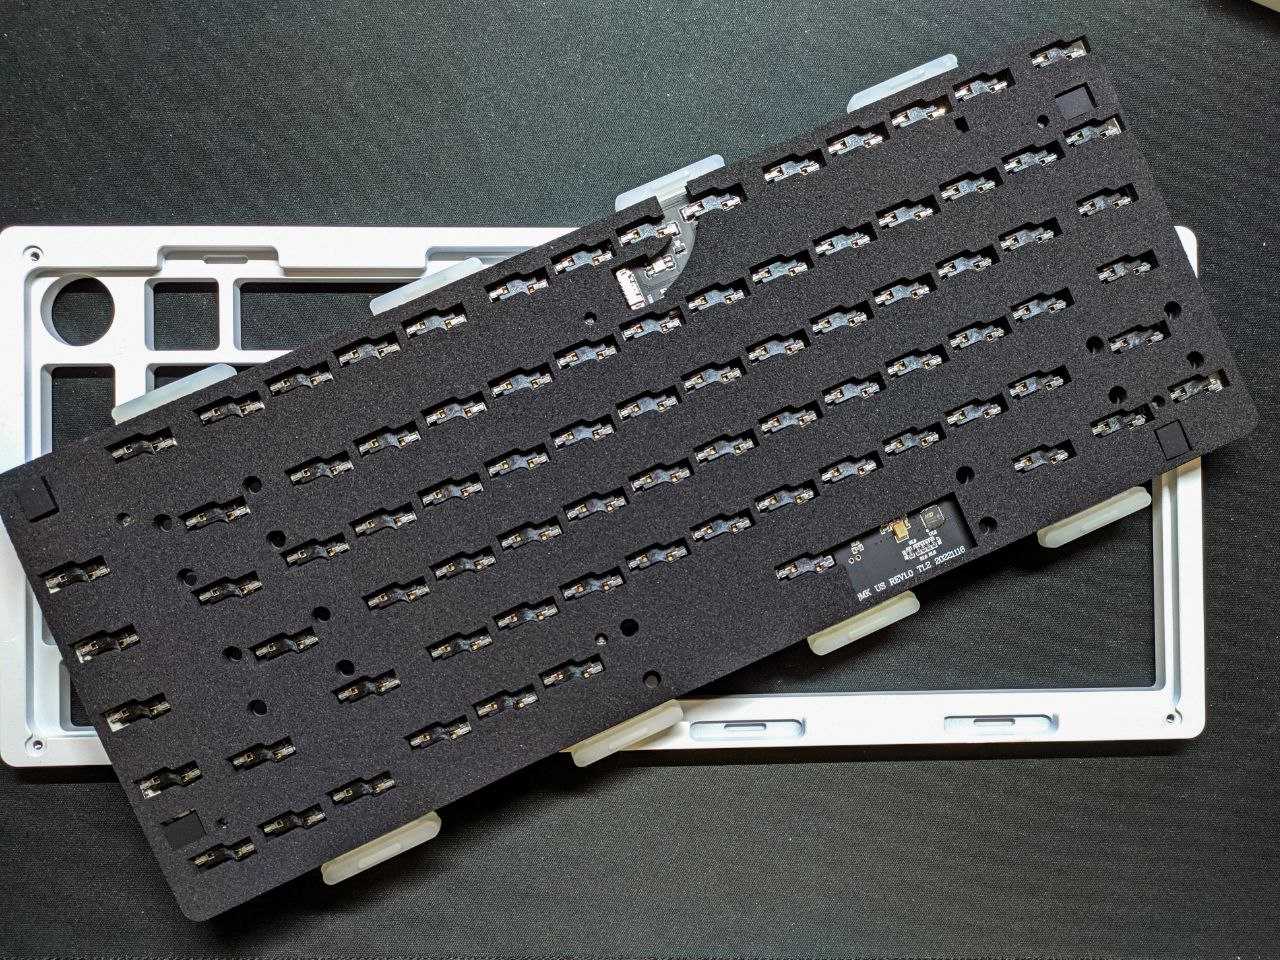
Let’s now analyze the inside of the keyboard. In fact, inside the aluminum shell we find a series of components aimed at improving the user experience. The bottom is filled with thick sponge. Above is a sort of plasticized sheet and then we have the PCB. Between the latter and the polycarbonate plate we also have sponge and the so-called switch-pad. Let’s now see how it is possible to mod the keyboard with the materials supplied in the package.
Force Break Mod
The black stickers that we have seen previously are used, as we have mentioned, to carry out a “Force Break Mod”. This mod essentially serves to attenuate the metallic noise coming from the case made entirely of aluminum. All you need to do is place the small stickers on the upper part of the case, in the internal section, around the entire perimeter.
Tape mod
This change is also really simple to implement. Normally this type of mod is done by applying several layers of masking tape to the bottom of the PCB to get a deeper sound. Akko and MonsGeek provide us with a sticker sheet to make the job easier. To make the sheet adhere better we will have to cut some holes for the raised parts and for the power cord.
Feelings and impressions – AKKO MonsGeek M1 DIY Kit review
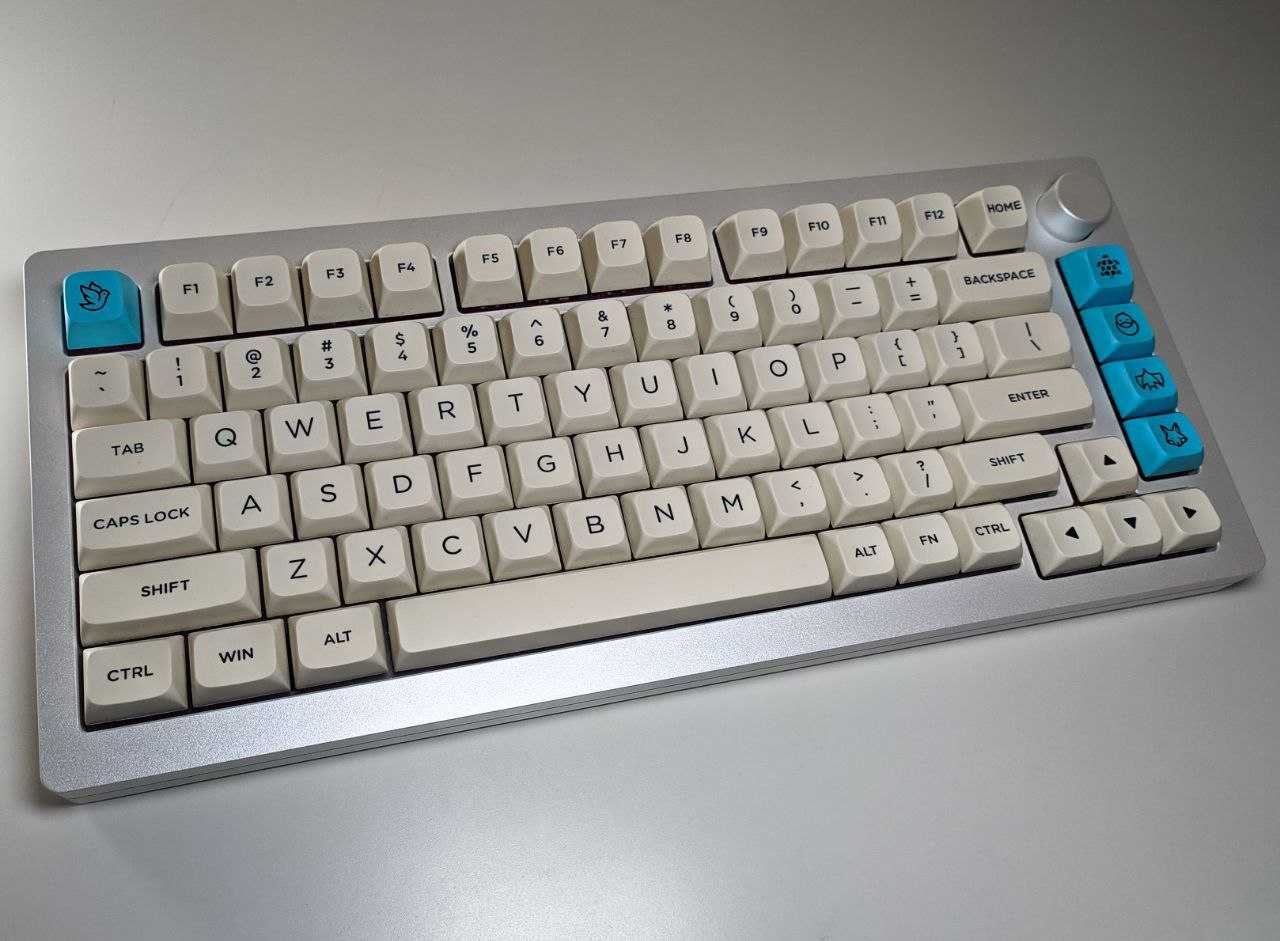
The AKKO MonsGeek M1 Kit oozes solidity from every pore. This aluminum composite body is really well made. Once the switches and keycaps are installed, weighs a good 1978 grams! We have chosen the white color, but black, pink, purple, red and Christmas red are also available. The texture of the metal is satin and on both sides there are golden details which undoubtedly enrich the aesthetics of the keyboard. The format of this custom is the classic 75% con knob which can be mapped to our liking. The knob is one of the only two faults we have found in this kit. First, the shape is too narrow and tall in our opinion. Then, unfortunately it tends to collide with the casemaking it difficult to use.
At the bottom there are four rubber feet which prevent the keyboard from going around the desk (as if the weight weren’t enough). There is no way to change its angle. The rear only has the Type-C entrance on the left side.
Despite being a “Gasket Mount”, the plate is incredibly solid and flexes very little even if we push hard. In addition to the knob, the part that least convinced us are the screw-in stabilizers. Despite the small mods used, the metallic ping is really annoying. Although it is present on each of the stabilizers, it is most audible in the spacebar, in which the stability did not seem very homogeneous to us.
Regarding lighting, this is the classic that has long been present in AKKO keyboards. This time, however, the program to handle it is called “MonsGeek Cloud Driver“. The interface is much more primitive than AKKO’s counterpart but the functionality is pretty much the same.
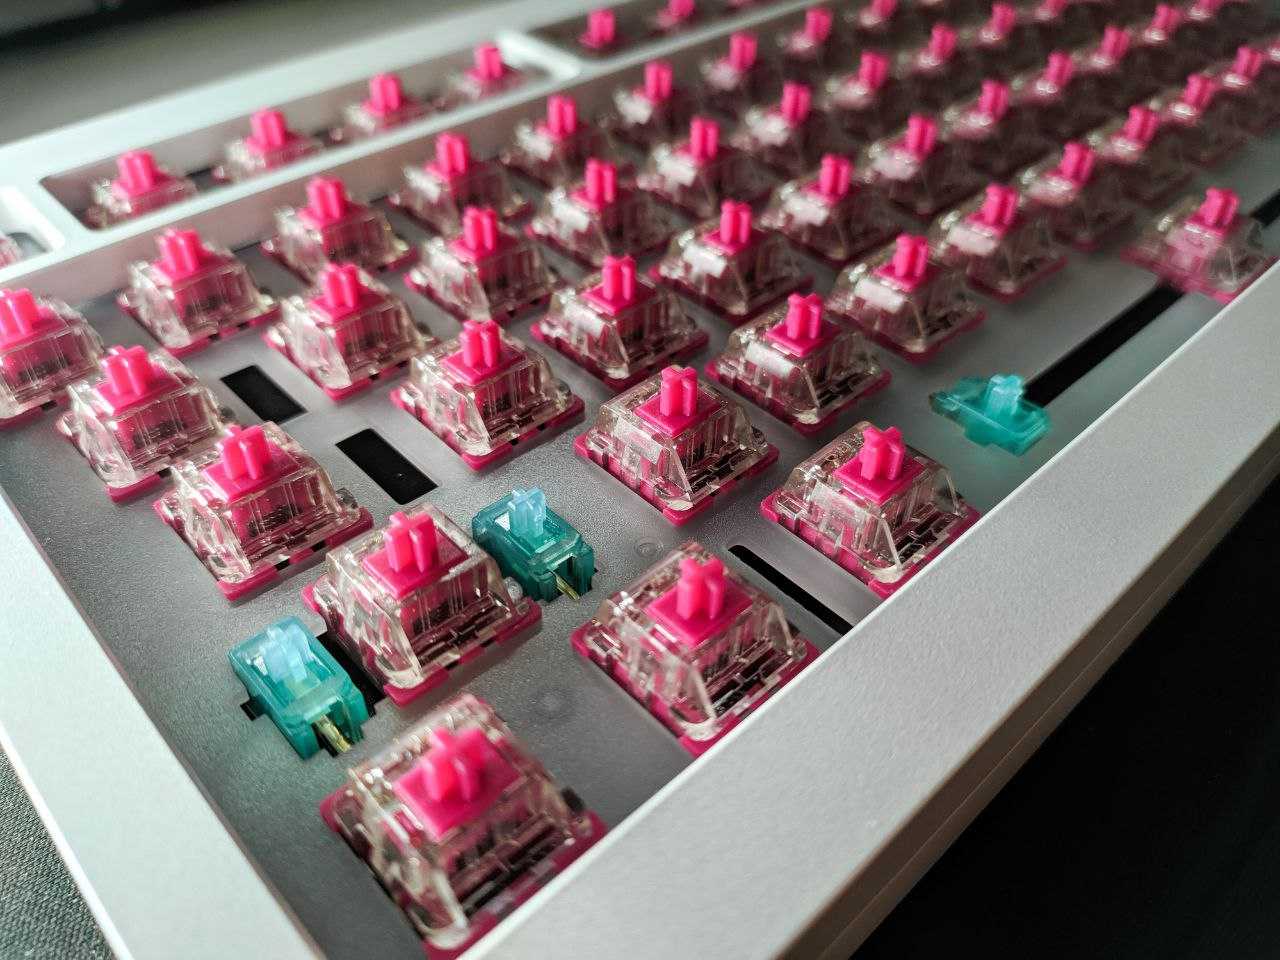
CS Wine Red Switches (Lubed)
AKKO supplied us with one of their factory pre-lubricated switch sets, the “CS Wine Red“. These are linears with a pre travel of 1.9 ± 0.3mm, a total travel of 4.0 – 0.5mm and an actuation force of 43 ± 5gf. This is our first time trying oiled switches from AKKO and we were really surprised. In this case, with the modifications implemented above, the sound is literally magnificent. If we had to transcribe it, we would describe it as a very full-bodied “Clack”.
The specifications are very similar to those of the “CS Crystal Switch” tested in a recent configuration. The feeling you get writing with these is better in all respects. Although there is also a slight rubbing with the plastic of the components here, it is in no way annoying.
We tested this configuration mainly in typing, but also in gaming. It’s great in both cases, but is better suited to the first scenario. The response of the keys is really precise and the force to be applied is, in our opinion, correct.
MDA Cream Keycaps
To the components already mentioned we decided to combine the set di keycaps “MDA Cream”, also by AKKO. The profile is, as the name implies, “MDA”. It means that, looking at the keyboard from the side, the keycaps will tend to get higher as we go towards the upper rows. This set consists of 282 keys. The coloring of the main keycaps is a somewhat vintage “cream”. Then we have some that approach a grayish gradient and some special ones with various stylized animals and bright colors.
We really appreciated this set, both for the profile which in our opinion is very pleasing to the eye and comfortable to type, and for the many customization options.

Sound test – Review AKKO MonsGeek M1 DIY Kit
Now let’s listen to a sound test of this configuration equipped with Force Break and Tape mod:
https://www.techgameworld.com/wp-content/uploads/2022/12/audio-akko-monsgeek-m1.mp3
Let’s sum up
The AKKO MonsGeek M1 DIY kit has great strengths. In our opinion, one above all is the selling price: €154,69. In the custom field, especially for peripherals made entirely of aluminum, this is certainly a competitive price. Apart from a couple of shortcomings, we would like to say that this is one of the best DIY kits with a 75% interface in this price range.
If you are interested in purchasing this keyboard, please click here.
We thank, as always, AKKO for the collaboration and invite you to follow our pages for more reviews of peripherals and more!
Plus points
- Very solid
- Excellent materials
- Aesthetically very satisfying finish
- Excellent internal soundproofing
- Prezzo
Points against
- The stabilizers are not the best
- The knob tends to hit the case