
In this review we will analyze the new EZVIZ BC1C surveillance camera, equipped with WiFi connection, built-in memory and much more!
How many of us have always wanted to have a surveillance camera in their home, but have never taken one because of the inconvenience of installation? Securing our properties is an increasingly essential prerogative nowadays and, although a video camera cannot guarantee us 100% protection, it certainly helps a lot.
The problem with such devices is that, in most cases, we will need to drill holes for power cables, rather than for viewing movies. What if we told you that there is a security camera that is free from these problems? Recently launched on the market, EZVIZ BC1C is the newcomer in the catalog of the well-established manufacturer of appliances for home security. Among its peculiarities, we find WiFi connectivity, integrated battery and memory, as well as various other interesting features. Let’s find out together in our review!
Technical specifications
- Image sensor: 1 / 2.8 ″, 2 megapixel progressive scan CMOS
- Minimum illumination: 0.2 lux with f / 1.6 with active AGC; 0 lux with IR
- Self-adaptive shutter
- Lens: 2.8mm with f / 1.6; 125 ° diagonally, 107 ° horizontally
- Lens mount: M12
- Day and night display: IR filter with automatic switching
- DNR 3D
- Night vision up to 10m
- Maximum resolution: 1920 × 1080
- Frame rate: 50Hz at 25fps, 60Hz at 30fps Self-adaptive functionality when broadcasting over the network
- Video Compression: H.265 / H.264
- Video signal transmission rate: Ultra-HD, HD, standard. Adaptive baud rate.
- Audio signal transmission rate: self-adaptive
- Velocità in bit max: 2 Mbps
- Standard Wi-Fi: IEEE802.11b, 802.11g, 802.11n
- Frequency range: 2.4GHz ~ 2.4835GHz
- Channel Bandwidth: Supports 20MHz
- Sicurezza: 64/128 bit WEP, WPA/WPA2, WPA-PSK/WPA2-PSK
- Transmission rate: 11b: 11Mbps; 11g: 54 Mbps; 11n: 72 Mbps
- Wi-Fi pairing: AP
- Minimum network requirements: 2 Mbps
- Local Storage: Built-in 32GB eMMC memory
- EZVIZ cloud storage
- Operating conditions: -20 ° C to 50 ° C; maximum humidity 95% (non-condensing)
- Degree of protection: IP 66
- Power supply: 5V DC / 2A
- Battery capacity: 7,800mAh
- Absorption: Max 5 W
- Product size: 104.76 × 62.80 × 62.80mm
- Product weight: 365 g
Unboxing and First Impressions – EZVIZ BC1C Review
The compact sales package features an image of the product on the front and some specifications on the back. The supply is quite rich. If on the one hand we have the classic information booklets and a quick guide, on the other we will find the magnetic base, that screwable, l’power supply (from 5.0V) with the cavo USB-A on the one hand and micro-USB on the other, in addition to a dowel kit it’s a template for drilling.
Lift the two packages, we will find the protagonist of the review wrapped in a protective plastic. Characterized by a smoke and black finish, the camera is really nice. The body it’s completely metal, except for the plastic front, because of the sensors and the lens. Its construction exudes solidity, both due to the excellent finishes and the fairly substantial weight. Because of the materials and the 7,800 mAh battery, in fact, only the camera body reaches 361 grams!
On the front we find the2.8 mm lens, i due flash led and the various sensors. The body features the key which will allow us to turn on the device, turn it off, or reset it. Other than that there is one speaker and theentrata micro-USB for charging covered by a rubber flap. The back instead has a recess to match the magnetic base and a thread aimed at screwing the second type of base.
Setup and Installation – EZVIZ BC1C Review
Setting up the camera is very simple to do. To complete it, in fact, we just need to have our smartphone with the EZVIZ app installed, available on both Android and iOS. Once the QR Code placed under the cam has been scanned, the setup will start which will take a few minutes. In the latter we will only have to enter an additional identification code (always present on the label of the camera) and set up our WiFi network.
After that, we will be ready to install the camera on the wall, or on the surface we have chosen, whether it is inside or outside our home (thanks to the IP 66 standard, in fact, it will not fear any weather). Here we are met by the drilling template present in the package, which will make us understand where to make the holes to position the dowels. Make the holes with the drill, just place the dowels always present in the package, position the back of the base (previously unscrewed) and tighten the screws blocking it to the wall.
Here we will have two possibilities: use the magnetic support, or the screwable one. In case you are inclined to have to move the camera frequently, we advise you to proceed with the first. Although it may appear as “unstable”, we assure you that the magnet has a very strong attractive capacity, so the BC1C won’t move at all. Since we didn’t need to move it, we used the threaded base. Both, Anyway, allow you to tilt the camera in all 4 directions. However, the magnetic one seemed slightly more limiting.
For a correct installation, the company recommends positioning the video camera no more than 3 meters high and within 7.5 meters of the area we want to monitor.
The EZVIZ App – EZVIZ BC1C Review
Not having an Android TV or a Google Chromecast, we only used the app on our Android smartphone to control this EZVIZ BC1C. Initially, we will obviously have to create our account and protect it with a password or by logging in with the fingerprint sensor. The main interface that appears once the application is started is very clear. At the center of it there will be the video camera (or video cameras) installed by us, to which we will give a name to “label” the area it will monitor.
On the upper side, in addition to the company name, we find the icon to change our profile, the setting that will allow us to change the aesthetic layout of the app, in addition to the icon to add a new room. The lower side allows us to switch from the device list to the library. The latter is nothing more than a list of videos recorded automatically by the device once it detects movement. These short clips are clearly sorted by day and time slot.
By clicking on the large window with the name of the camera (on the main page of the device), we can start the “vista live“. A live broadcast will then start on our smartphone, in which we will see what happens in front of the cam. From here we can go directly to the library, take a screenshot, record a video “manually”, speak using the microphone of the smartphone and the speaker on the camera, activate the audible alarm e change the video definition.
Let’s analyze the various settings
Furthermore, at the top right, we will be able to change the camera settings to our liking. This represents the epicenter of everything because it will determine its general functioning. By clicking on “Operative mode”We can tell the camera about record shorter videos to consume less battery, rather than putting it on standby or even telling it to record 24 hours a day. We may also configure the mode based on time slot and specific days of the week.
The setting “Smart detection”Will allow us to change the distance at which the camera detects movements. Here we can choose between two types of detections: one based on Artificial Intelligence, while the other on infrared, which passively detect heat.
Notifications are divided into two settings: “device side” and “app side”. While the former will manage the audio or light alerts that the camera will emit once a “target” has been sighted, from the second setting we can manage the application notifications that will arrive on the smartphone. Furthermore, we can (also here) set everything by time slot. If we wanted the camera to emit an alarm at night (or on a certain day), we can then set it safely.
The remaining options will allow us to change the quality of the image, the tone of the latter, manage the incoming audio and activate or deactivate the status LED.
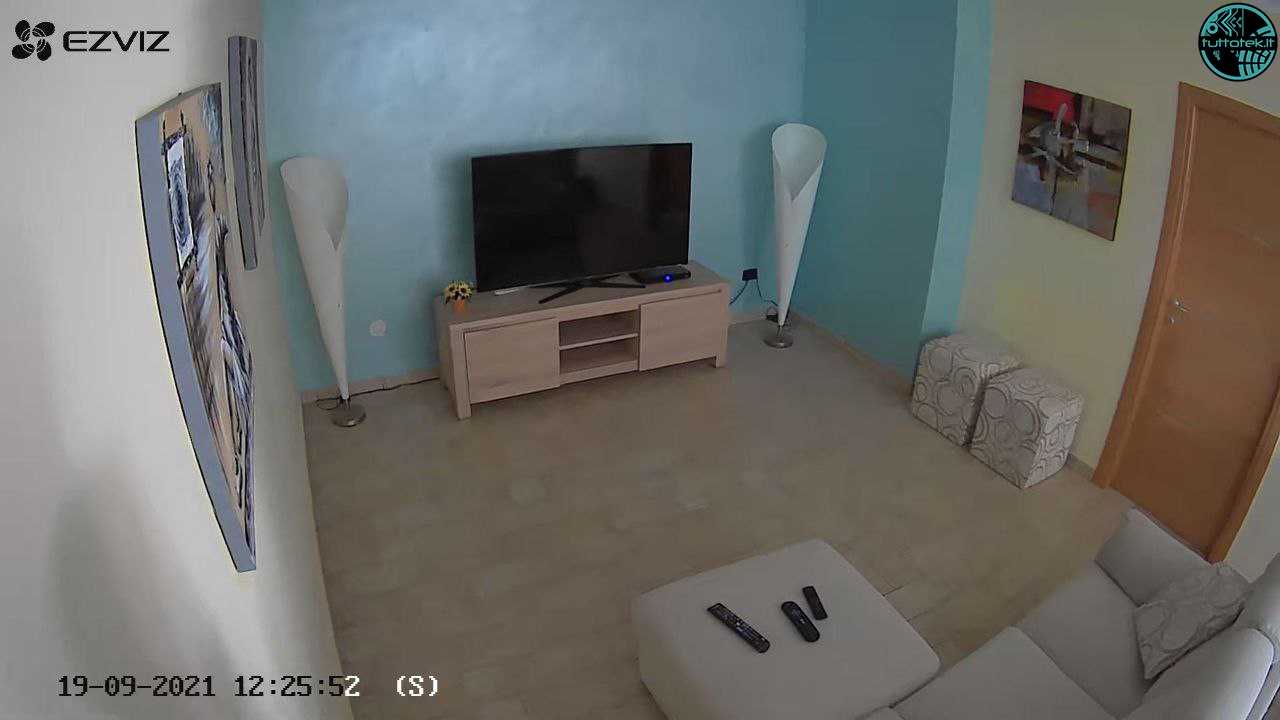
Screenshot captured in a well-lit room
Our Experience – EZVIZ BC1C Review
Once this EZVIZ BC1C was placed on the front of the house, we were ready to test it. We were immediately impressed with the video quality. With a maximum resolution of 1920 × 1080 pixels and a great one viewing angle that covers 125 ° diagonally and 107 ° horizontally, the image is sharp and really wide angle. If during the day the vision is clear and bright, even at night we have not encountered any problems. Here we have the possibility to choose whether to activate the two LEDs of the camera and, therefore, the image will remain in color, being able to have a excellent quality even in absolute darkness. Otherwise, we will meet the black and white night vision, which is not bad at all and saves a lot of battery.
The main function of this camera (and one that we have used most often) is the intelligent detection. This option does nothing but set EZVIZ BC1C in a state of “semi-sleep”, activating it as soon as it detects a movement. The detection range can be changed and, if set to maximum, it will cover about 5/6 meters from the location where the camera is installed. Once the subject has been detected, which can be a human being as a means of transport, one will be sent to us notification on your smartphone and we will be able to see the associated clip. By activating this mode, we will be able to trace only the clips recorded through the surveys and there will therefore not be a total clip of the 24 hours. Among the various options, however, you can select continuous recording, as long as you occupy all the memory in a short time and quickly discharge the integrated battery.
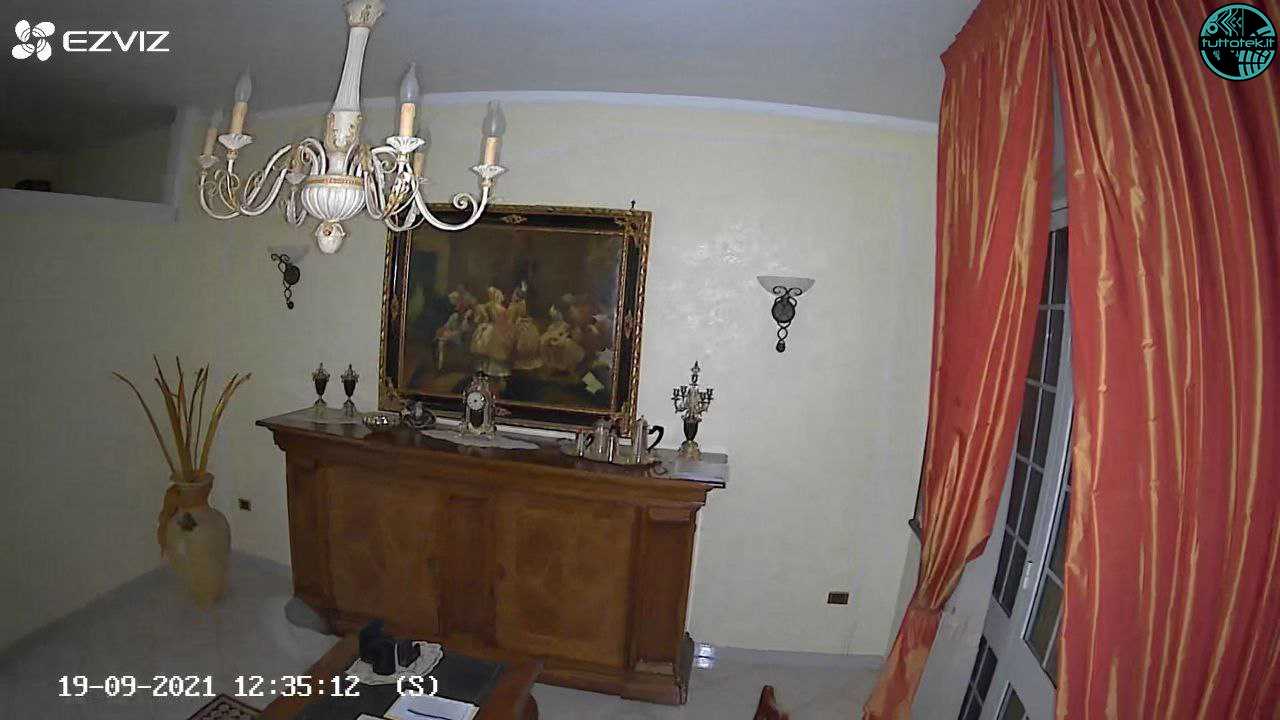
Screenshot captured in a dark room, with active lighting
While we have not encountered any problems with automatic recording of the various detections, very rarely we were not notified as someone walked past us, perhaps for momentary connection problems. Having a built-in memory, But, allows the camera to store information even if there is no power and / or possibility of communicating with the modem. This is a positive side since, even if the bad guys find the …