

In this mini-guide we will see how to transfer photos from iPhone to Windows PC. We will illustrate various methods, it will be up to you to choose the one you prefer!
Apple’s new smartphones like iPhone 13 and iPhone 13 Pro can take high-resolution photos that consume a lot of space. And then you know how it is: to get to a decent photo, you have to take at least 10. This leads to rapidly increase memory consumption on iPhones that can become a big problem especially on devices with 64 or 128GB of memory. The only way to not lose our memories and make room is transfer photos from iPhone to PC and then delete them from phone. So let’s see some methods that can be used to do this!

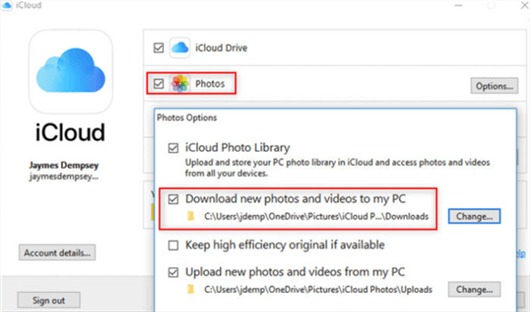
ICloud Synchronization | How to transfer photos from iPhone to PC
iCloud is a service that allows you to save our photos on a server to be able to synchronize them on different devices. Let’s see how to activate this service to transfer photos from iPhone to Windows PC:
The last step is crucial, otherwise the photos will stay in sync only on iCloud. This means that if we delete a photo on iPhone, it will disappear on iCloud as well. Instead now thereand photos will be automatically saved on our PC after being loaded. They will be available in the path indicated in the configuration phase, in the Downloads folder.
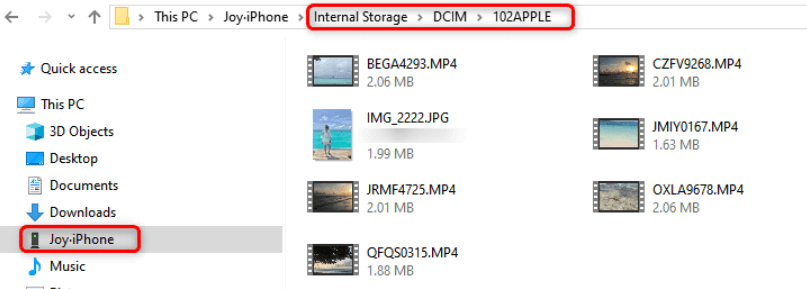
File Explorer | How to transfer photos from iPhone to PC
File Explorer is the Windows file manager that allows you to move, organize, copy and delete files and folders. We can use it to copy photos from our iPhone, even if it will be a bit more cumbersome:
Surely the process is longer and must be repeated periodically to have an updated backup.
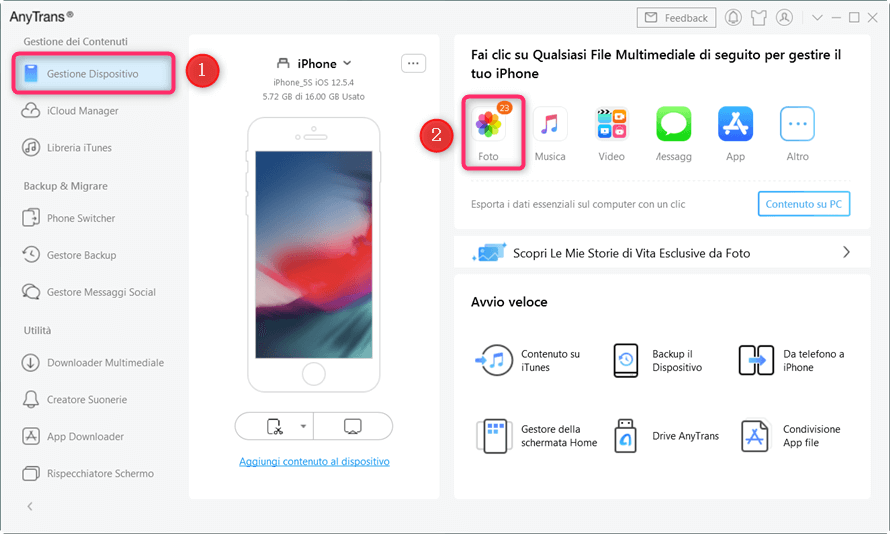
AnyTrans | How to transfer photos from iPhone to PC
Another option is to use a dedicated app like AnyTrans. It is about data manager for iPhone which can do, including transfer photos from iPhone to PC. The application also supports the most recent models such as iPhone 13 based on iOS 15. Obviously it is backwards compatible with all devices subsequent to iPhone 6. The procedure is very simple:
The process employs just a few minutes and all photos will be transferred successfully. You can then find the transferred photos in the Anytrans-Export-XXXX folder. Very simple and immediate! And above all, almost completely automated.
Which one do you prefer?
We have explained 3 methods to transfer photos from iPhone to PC, you can choose the one you prefer! That’s it from the mobile devices section, keep following us!
The article How to Transfer Photos from iPhone to Windows PC comes from TechGameWorld.com.