
In this guide we will see how to use WhatsApp on PC through BlueStacks, an Android emulator for Microsoft Windows and macOS that allows you to use applications for mobile devices directly on our PC
With the arrival and above all with the widespread diffusion of smartphones among the world population, applications were also born specifically created and optimized for smartphones which in some cases do not have (at least initially) a counterpart for PC or web. WhatsApp is the most popular instant messaging client in the world with over 1 billion and 600 million active users and about 65 billion messages exchanged every day between users. This famous service was created to replace the classic SMS and MMS, using the web network to send data. This made it possible to send text, images, audio and video without resorting to expensive and limiting MMS, making WhatsApp a success.
Subsequently, a version for desktop PC called WhatsappWeb was also presented. This service is accessible via any browser and allows you to access your conversations directly from your PC, useful for example for exchanging documents or simply to use WhatsApp when you do not have access to your mobile phone, for example at work. However, the web interface can be a bit limiting, which is why it can be useful to emulate the application via Bluestacks.
How to use WhatsApp on PC via BlueStacks
BlueStacks is an Android emulator available for Microsoft Windows and Apple’s macOS and is one of the best around. It is used by over 400 million users and can run over 1.5 million Android apps and games. The minimum requirements for BlueStacks Emulator include Windows 7 or higher with 2 GB of RAM or higher and 5 GB of storage and for Mac devices they are macOS Sierra or above with 4GB of RAM and 4GB of storage. The latest BlueStacks 4 version allows you to emulate the Android 7.1.2 Nougat system and, according to Antutu Benchmarks, is 6 to 8 times faster than any smartphone on the market (clearly performance may vary depending on the PC hardware used) . With the custom key mapping you can easily select and save keys for various functions. Mouse support and external touchpad controls are also guaranteed. There are many additional features like app syncing between Android phone and BlueStacks Emulator via a cloud app, transferring files to BlueStacks from Windows, installing apps via their APK files, and real-time translation of applications.
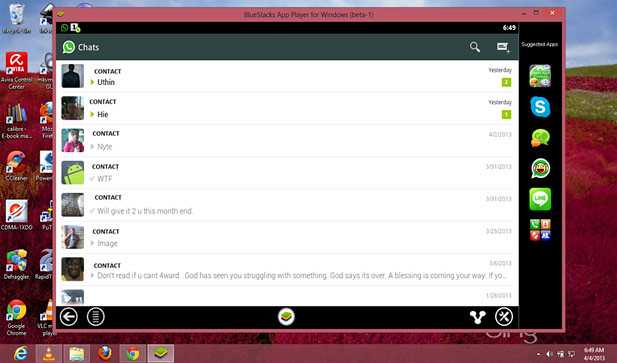
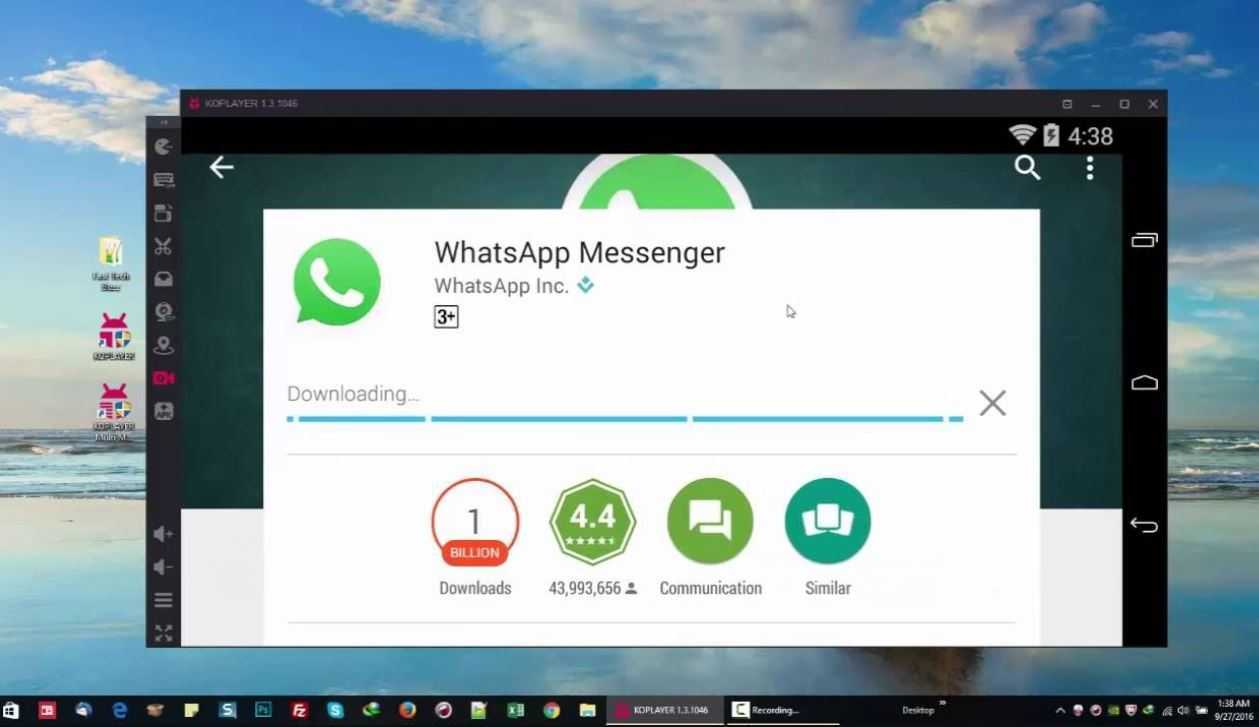
All these features can certainly also be useful for using WhatsApp. The BlueStacks home page looks like one application and game store. To use WhatsApp in BlueStack, you will need to search for the app and connect to your Google account inside the emulator. Now you can download the application. You can also install it via the APK downloaded to your PC. Once installed it will be visible in the “My games” section. We will have to accept the contract and enter the telephone number (attention: if you use the same as your smartphone, the app downloaded on it will stop working). You will then have to confirm the number via SMS or by calling WhatsApp directly. Now you can use the app! Unfortunately, the contacts will have to be added manually by transcribing the numbers of our friends and we will not be able to synchronize the messages. From the web and social section, that’s all! Keep following us!