

Rainbow Six Extraction is a game that makes strategy its main component, that’s why we have written a small guide for each game mission. After all, each submission requires a specific approach to avoid dispersing its operators in action.
Guida a Rainbow Six Extraction
Frustration, operators lost in action and difficulty in achieving even the objectives at the lowest levels? Don’t worry: we’ve all been there. After all Rainbow Six Extraction it is by no means a simple game, which is why we have come up with this little guide. It must be remembered that the strategic component is fundamental in the game and embarking on raids with strangers without the possibility of communicating is often the first step to give it to the Arks. Whether solo or co-op, however, the secret to victory is the right approach, and each mission has its own. So forget about going around and shooting as hard as you can, this is a game in which the winner is whoever thinks first with the head and then with the gun.
Each raid has three sub-zones with three randomly chosen missions, so don’t underestimate the choice of the operator, as each of the 19 available has unique abilities. Having said that, let’s analyze mission by mission to understand how to defeat the alien parasite.
Tips for all missions
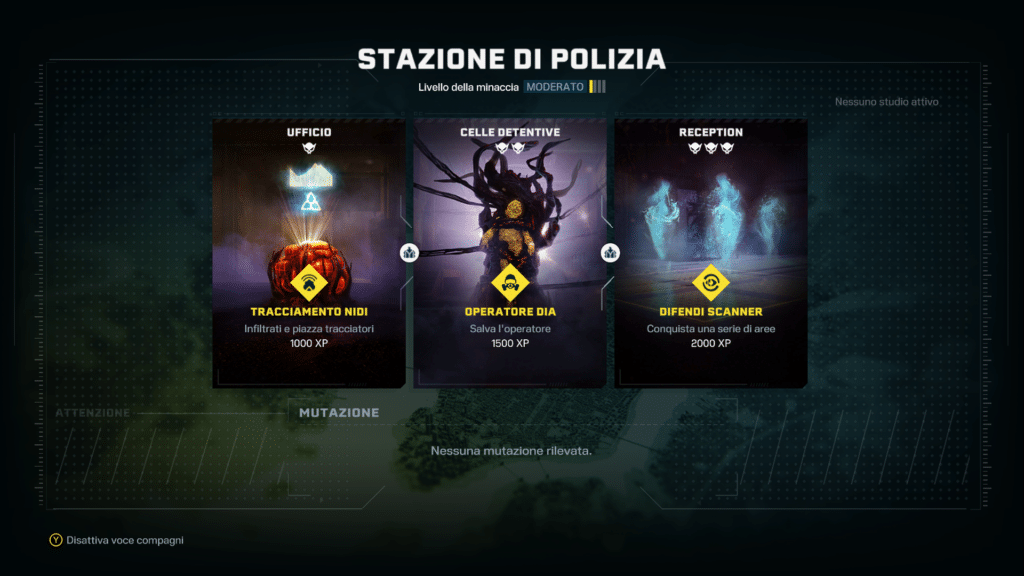
Nest Tracking: whether you go solo or in co-op, this is a stealth mission. You will therefore have to prefer the use of silenced weapons and perhaps paralyzing explosives (if you have them unlocked). These will allow you to paralyze the enemies that have discovered you before they emanate that ominous scream that will alert the nests, compromising the mission and putting your health at risk. The purpose is in fact to trace the sleeping nests, but if these are alerted they must be destroyed. If too many nests are destroyed the mission will fail. If you are on a team be sure to cover the backs of teammates who inadvertently get caught.
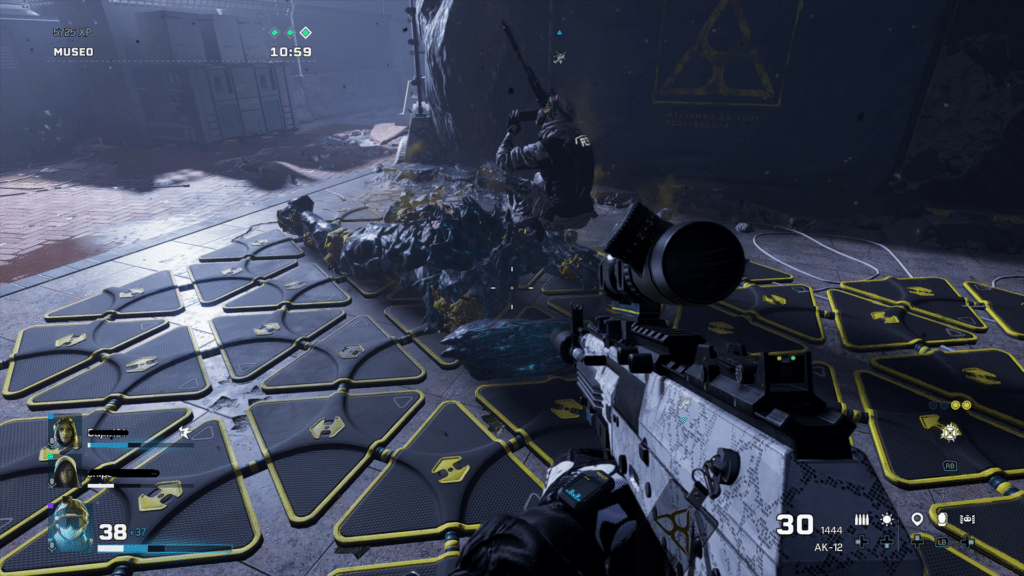
Evaluate the use of a drone to study the positioning of enemies, and try to eliminate them from a distance, with a silenced weapon shot to the head (a zoom sight can be useful). In the case of archaea with a hidden weak point (saboteurs / tormentors / concealers, etc.), evaluate the killing behind. Remember that you will have to necessarily kill the enemies: after all, opening fire will increase the possibility of being discovered. Be stealth and focus on the nests. It may be convenient to use operators that can track nests quickly (such as Pulse).
Live specimen: in this mission the aim will be to lure a specific enemy to the extraction point, to trap it with the appropriate technology. To do this you will literally have to play marameo and be chased. Consider that acting as a decoy the enemy will have to notice you, and therefore will alert his disgusting friends. So try to kill the archaea and destroy the nests before starting the chase, so as not to encounter unpleasant and alien obstacles. If you are in a team, one member of the team can act as bait, another can cover his back from any enemies and the last one can be ready to activate the trap-mechanism. If you have a teammate in poor health, make sure he takes care of this latter task. From the moment of activation, the trap will run for 12 seconds, so you have plenty of time to make the most of it.
Decontamination: Can be the hardest of all, especially in co-op with reckless, low-level teammates. The aim will be to destroy all the aberrant nests, but when one of them is torn apart all the others will wake up and start producing archaea of various types that will attack you. It is therefore necessary to optimize the times and make sure that everyone is in position before attacking the first nest. Count how many aberrant nests there are and make sure you know exactly where they are in order to destroy them as quickly as possible. This tactic is also useful in solo mode, so you’ll be able to figure out how to move after the first nest. You might be comfortable with Rook (who has the ability to drop armored plates to comrades) and prefer noisy weapons to silenced ones – you won’t need the stealth approach.
Sabotage: also in this case the coordination of the team is important, to avoid that the mission is activated without the others being ready. The goal is to arm explosive charges to destroy archeological towers, and you’ll have to protect the explosives until they detonate. Easier said than done as enemies will begin to arrive from all sides. The advice is to take time, barricading windows and walls. Each operator only has 3 wall reinforcements available, but each REACT reload will provide you with additional ones. Go for noisy weapons and consider the Alibi Operator who can throw holograms that distract enemies. In only mode, the charge to be preserved will be only one, making everything more accessible. Among the explosives, the Claymore mines could be useful, while the REACT equipment recommended is the automatic turret.
Scanner series: very similar to the Sabotage mission, but in this case the operators are required to remain in a well-defined area until the end of the countdown. The strategy remains the same: barricade doors and windows and try to place traps and mines using the equipment and skills of the various operators. There will be three areas to scan, so try to manage your mines and health well. Also in this case the holograms of Alibi could be useful, while DOC and Finka are recommended to restore the momentary HP to the companions (but also to themselves).
Shutdown: the aim will be to reach the extraction point to recover a foam injector to be taken to a specific point. Remember that in this mission the nests will be reborn after being destroyed, so the stealth approach is key. If you are in co-op always move together, so as to cover each other’s backs. Being quick is also essential, so as to place the injectors quickly and permanently destroy the nests. Very useful are the drones to ping all the enemies and make sure to be discovered as little as possible. If you get caught try to run as fast as possible to complete the mission as soon as possible. The key word for this mission is team compactness.
DIA operator: it’s time to recover a missing operator! If the operator is yours, the advice is to recover it in solo mode, at a low level, so as to be sure to succeed in the mission and not to lose the progress of the brave soldier. Once you have located the archaic tree trapping the soldier, make sure you have killed all the enemies nearby and destroyed all the nests: there is no worse thing than starting the rescue with a sea of archaea attacking you. Before starting it is also recommended to clear the path leading to the extraction capsule, so as to be sure to bring the body of the DIA to safety without surprises.
Once the area has been cleaned up, and before starting to save, also eliminate all the archeleoma: you will need space to move (for this purpose the laser that unlocks at level 25 could be useful for you). If you are alone, make a visual note of the anchors to be destroyed, then take out the missing person and immediately leave him to shoot the anchors. In a team, on the other hand, it is better for one to continue pulling the missing while the other two get rid of the anchors. Heavy, noisy weapons can help a lot more than silenced ones.
Rescue: a scientist must be brought to safety, so you must be absolutely stealth. If the archaea detect you they will start attacking the resource, killing it and making you miss the mission. Use a drone to figure out how many and which enemies surround the scientist, so as to kill them silently. Remember that UV light allows you to spot weak spots and shoot through thin surfaces. In case you happen to be spotted, don’t give a damn about the silence and run towards the resource shooting as hard as you can: a few attacks from the enemies will be enough before it dies, so you have to be fast. Once you have saved the resource, do not rush to the extraction point. First clear the path so that you can escort her without any archaic surprises. In fact, remember that escorting the scientist will mean using only the secondary weapon, which could be inconvenient in multiple conflicts.

Triangulation: it is a relatively simple mission which consists of activating a series of three computers (stations). These must be operated sequentially (A, B and C) over a specified period of time. Make sure you have identified them all though: the most common mistake is to activate the first and find yourself a sea of enemies that separates you from the second. If you are alone, just kill all the enemies in the areas (stealth approach recommended, but it’s up to you) and then activate the stations. In co-op the advice is to identify the three stations and have each team member stand near each one. At that point the operator at station A can start the sequence and the mission is as good as completed.
Biopsy: you will have to kill certain enemies only with the REACT blade. It sounds difficult but it is actually one of the simpler missions. Even if you are not good with the stealth approach, do not worry: REACT explosives will come to your rescue. Use grenades …