
Photography with smartphones is now simple and intuitive and allows us to take photos anywhere: but how to take beautiful photos with your phone? Here is our guide to turning our smartphone into a camera
Photography with smartphones is simple and intuitive, it allows us to take photos anywhere and above all it offers us enormous potential. About that, Did you know that you can turn your phone into a camera? Well yes, because our smartphone not only allows us to take photographs in automatic mode, but has some manual settings just like a camera. In this guide we will see how to take beautiful photos with your phone by discovering all the functions of our camera!
Smartphone photography: how to take beautiful photos with your phone
Very often you look at photos taken on social media and think you can't reach certain levels because who knows which professional camera was used. And instead it's a smartphone, perhaps of excellent quality and used to its full potential. When a professional photographer picks up his camera, whatever brand it is, be it Canon, Nikon, Fujifilm, Sony, Panasonic, Olympus, he turns the settings dial to M or Manual mode. Which for a photographer means deciding the photographic settings of his camera himself and deciding exactly how to photograph.
Well, these phantom manual settings, they are also available on our smartphones and if they are not available on some of the most cutting-edge models it is not due to lack of quality but due to the brand's choice to supply a “point and shoot” camera therefore based on immediacy.
Manual modes are available on smartphones depending on the type of brand and also the price range, for example Samsung, Xiaomi have the PRO mode which is located above the shutter button by scrolling through the different settings, Motorola has the M mode which is select on the viewfinder, Google Pixel has a symbol that indicates the possibility of adjustment and parameters directly on the screen.
But what are these manual settings? So let's open the camera on our smartphone and discover them together.
Smartphone photography | Timing/Shutter
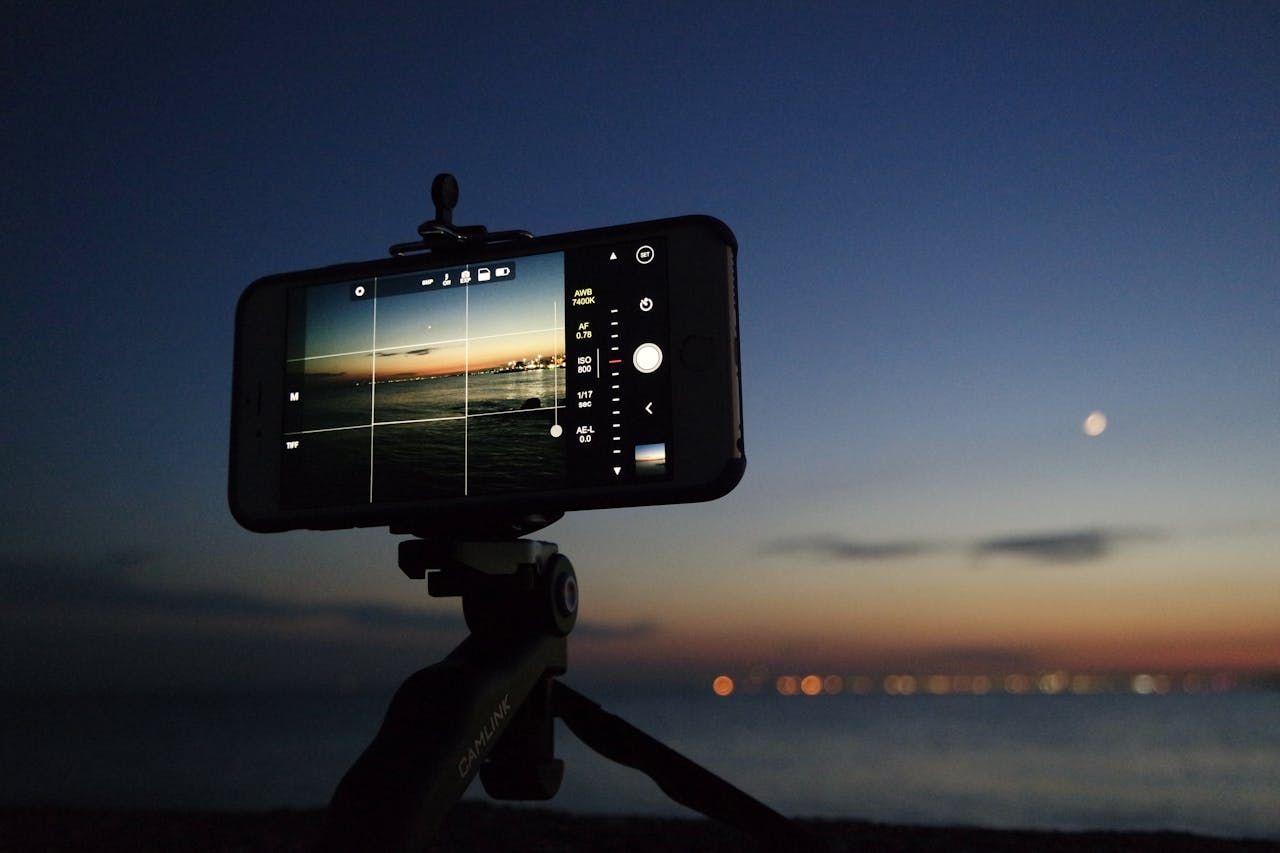
In photography they are called shutter speed/shutter/shutter speed but they indicate the same thing, that is, the time in which the camera shutter remains open and allows light to enter the sensor. In the smartphone the shutter is obviously made by a digital mechanism, but the concept is the same: with slow shutter speeds we gain more light for our photo, with faster shutter speeds we have less light. In the case of slow shutter speeds we must be careful not to move our camera because obviously every movement is perceived and the photo risks being shaken.
Govern this timing mode on our smartphone It allows us to get more light when it isn't there as well as playing on creativity, taking advantage of the slow speeds of our camera to obtain photographs of moving subjectslike cars speeding through the city or people moving for a bit of street photography.
Smartphone photography | Diaphragm
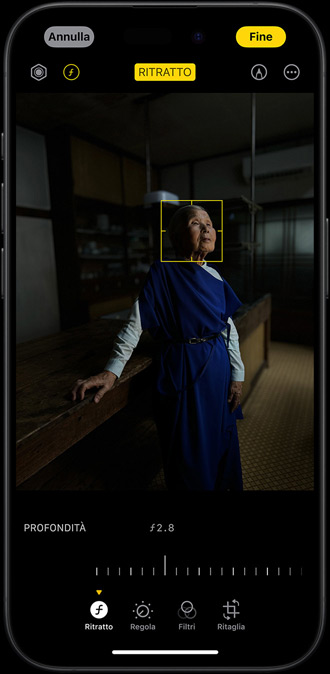
Another fundamental piece for manual photography it is the diaphragm, or another way to obtain light: when the iris is open its blades allow for more light and less depth of field, while when the diaphragm is closed, we have less light and more depth of field. In photography the aperture is determined by the lens mounted on the camera and works like the pupil of the human eye. To be more precise, the diaphragm is what determines the bokeh effect in portrait photography, i.e. the subject in the foreground and the background in the background and blurred.
To achieve this effect, the aperture must be opened as wide as possible, for example f/2 or if possible on even lower numbers, such as f1.8. In the case of landscape photography however, the ideal would be a small diaphragm, with numbers like f/8 to be able to have greater depth of field in our photography.
The aperture in smartphone cameras is usually set automatically, so it is difficult to adjust. But often there are automatic modes that we can choose ready and which correspond to the same effect that an aperture adjustment would give us. For example, the iPhone 15 offers an aperture set by default at f/1.9, therefore extremely open and offering great brightness. Inside the iPhone camera, from SE models onwards, there is the mode “portrait” which applies a depth of field effect that keeps the subject such as people, animals, objects, in focus creating a blurred background. Here you can also apply and adjust various lighting effects in portraits. Usually when the aperture mode is present, as in the case of the iPhone, it is indicated with the letter f, in lowercase and italic.
Smartphone photography | ISO
And we come to the third mode of manual settings cwhich completes the famous “exposure triangle” known in photography and let's talk about ISOs. ISO indicates the sensitivity of the camera sensor, that is, the quantity of light that a film can absorb in a period of time.
In smartphones with manual mode, the ISO is almost always there, except in the case of iPhones which are set automatically. Iso is another parameter that allows us to obtain more light, with the compromise that the more light enters, the thicker we get a grain in our photography which in technical jargon is called “noise”. It is always better to keep them low when possible, therefore from parameter 100, but if we need light, we know that they are there and that they can be adjusted.
Smartphone photography | White balance
In the manual settings in our smartphone we also find the white balance or the parameter with which it is possible to correct color or tone casts. A classic example is when we are faced with a snowy landscape and if the sky is overcast, therefore with little light, our photograph could come out with a blueish tone. White balance helps us cool or warm the color tone to make it as close to reality as possible or close to our artistic needs.
On the smartphone we can find it with symbols that indicate the weather conditions, cloudy, with sun, without sun, or with parameters with which it is possible to establish the tone of the light.
Conclusion
As we have seen smartphone photography it can be very close to the one with the camera, especially since in recent years smartphones have been focusing so much on the photographic department and its performance. By knowing our smartphone's camera better we can really have fun and get photos exactly as we would like without applying too much post production with editing programs.
Let us know if you try using your smartphone camera manually and what the results are! In the meantime, continue to follow techgameworld.com for all the updates on the world of photography.