

In this guide we will find out how to install Oracle Java 14 (Oracle JDK 14) on Ubuntu, Debian and Linux Mint via APT or PPA repository
The platform Java it is one of the most important API (Application Programming Interface) used by professional developers and more. This platform has the characteristic of making it possible to write and execute applications independent of the execution hardware; this is virtualized by the platform itself, thus making the Java language and related programs portable on different hardware platforms. Let’s start this guide now and see how to install Java 14 (JDK 14) on Ubuntu, Debian and Linux Mint tramite i repository APT o PPA.
What’s new in Java 14 and how to install JDK 14 on Ubutnu, Debian and Linux Mint
Oracle JDK 14 offers new features to improve developer productivity. Among these are: the Java language support for switch expressions, new APIs for constant monitoring of JDK Flight Recorder data and the availability of Z Low Latency Garbage Collector for macOS and Windows operating systems. The new release also includes three preview features: Pattern Matching per instanceof (JEP 305), Records (JEP 359) e Text Blocks (JEP 368). For more information, you can view the official release announcement.
Before continuing, please note that Oracle Java uses a commercial license that started with Java 11. This allows you to download and use the platform for development and testing for free; in case of production, however, a payment is required to be able to use it. In this case you can use open source JDK builds such as those offered by AdoptOpenJDK or Zulu OpenJDK.

Let’s see how to install Java 14 (JDK 14) on Ubuntu, Debian, Linux Mint and other operating systems using the PPA and APT repositories
This Oracle Java 14 installer is package based Java Web Upd8 with slight modifications. Through this we will be able to automatically download and install Oracle Java 14 and optionally set it as the default Java on the system. However it is available solo su build a 64 bit. There is therefore no need to manually download the installer, although this may be required in case of errors during the download due to some network settings, proxy or firewall restrictions, and other causes.
Ubuntu, Linux Mint and other Ubuntu-based distro
The installation process for these distributions is really very simple. All you have to do will be open the terminal and use the commands below to add Oracle Java PPA and install version a for 64-bit build.
sudo add-apt-repository ppa:linuxuprising/java
sudo apt update
sudo apt install oracle-java14-installer
In Linux distros that automatically install recommended packages (such as Ubuntu, but not Linux Mint), oracle-java14-set-default is already installed. This package sets Oracle JDK 14 as the default version on our system. However there is a way to simply skip this installation process and that is to replace the last line with:
sudo apt install –no-install-recommends oracle-java14-installer
If you want instead install the package as it did not install automatically, you will need to use the following command:
sudo apt install oracle-java14-set-default
Debian and other Debian-based Linux distros
Also in this case the procedure is similar to the previous one, but it will take a few more command lines. Again, just open the terminal and use the commands listed below.
su –
echo “deb http://ppa.launchpad.net/linuxuprising/java/ubuntu focal main” | tee /etc/apt/sources.list.d/linuxuprising-java.list
apt-key adv –keyserver hkp://keyserver.ubuntu.com:80 –recv-keys 73C3DB2A
apt-get update
apt-get install oracle-java14-installer
exit
These are the two installation processes to follow. To apply the new JAVA_HOME environment variable, you will need log out and then log in.
In case you don’t want that anymore Java 14 is the default version on your operating system, just remove the oracle-java14-set-default package using the appropriate command:
sudo apt remove oracle-java14-set-default
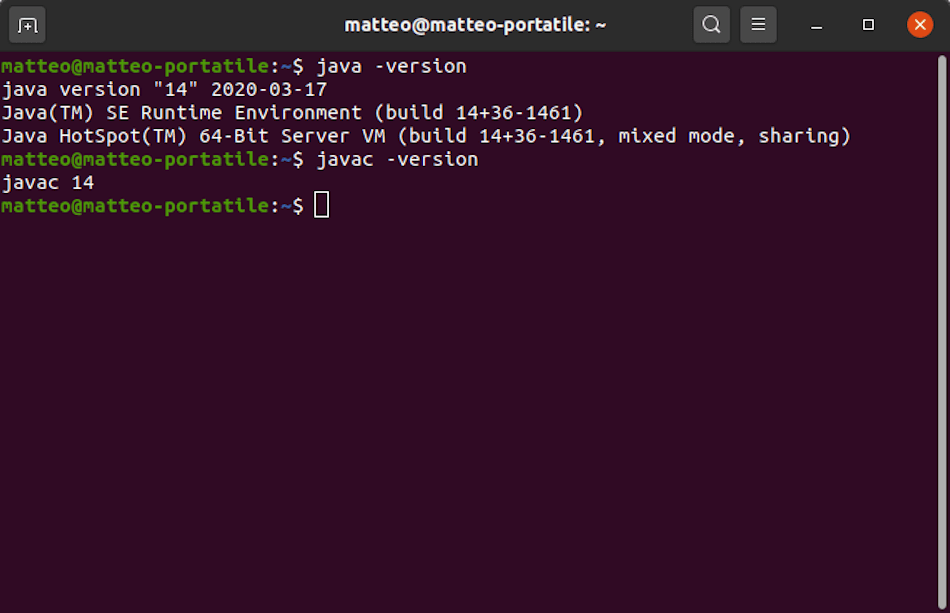
Once you have completed the steps that interest you most, it will be possible check the Java version using the appropriate java -version and / or javac -version commands. The result obtained should be similar to that of the image below.
How to install Java 14 (JDK 14) on Ubuntu, Debian and Linux Mint via manual download
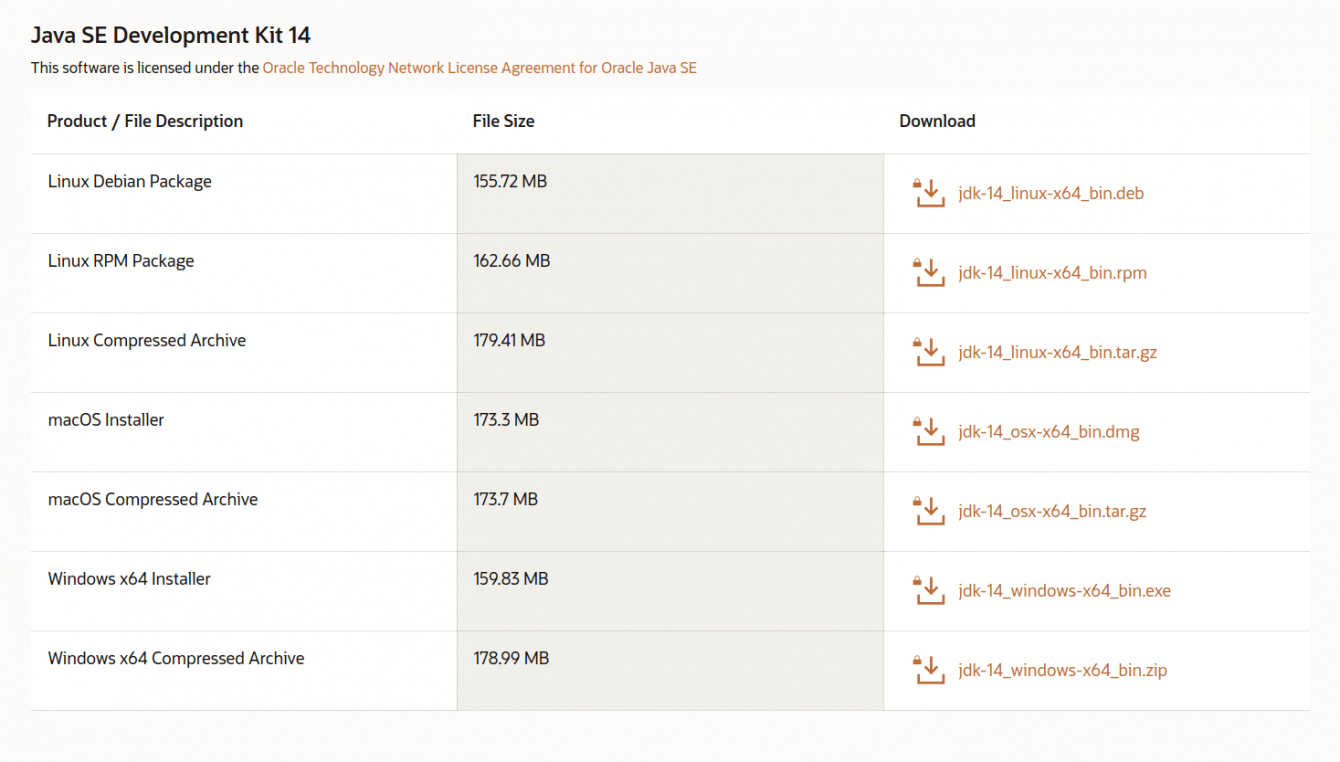
In case the Oracle JDK 14 download fails and is blocked by the firewall, router or some proxy that prevents the installer from downloading it automatically, we will have to resort to the manual one. All you have to do is download, from the computer on which you want to install it or from another machine, via the official page the jdk-14_linux-x64_bin.tar.gz file and place the file in / var / cache / oracle-jdk14-installer (if it doesn’t exist, create the path).
Then you will need to install the package through the PPAs as explained above. This way, instead of trying to download the Oracle Java 14 archive, the installer will use the local version downloaded manually. If you want to use the Oracle Java 14 installer in some automated scripts, this is possible manually accept the license using this specific command:
echo oracle-java14-installer shared/accepted-oracle-license-v1-2 select true | sudo /usr/bin/debconf-set-selections
If the above doesn’t work, you can try this here:
echo oracle-java14-installer shared/accepted-oracle-licence-v1-2 boolean true | sudo /usr/bin/debconf-set-selections
For this guide on how to install Java 14 (JDK 14) on Ubuntu, Debian and Linux Mint that’s all. We remind you that the beta of Ubuntu 20.04 Focal Fossa. For more details and for find out how to download it, I suggest you to read our article by clicking here. For other news concerning the technological world, continue to follow the pages of techgameworld.com!