
The moon is splendid, with its different shapes and colors every night making us think that it is not easy to immortalize even if in reality photographing the moon is quite simple, how? Let’s see our guide together in 5 tips
The moon is splendid, we know it and we can see it on the nights when it gives us colors and shapes that make us spend hours looking at it with our noses in the air. As a song by Gianna Nannini and Coez says, I who don’t come in photos, a bit like the moon, You who are beautiful in real life, yes, like the moon, however splendid it may be to the eye when we want to photograph it, the result does not satisfies us. Why is it difficult to photograph? Actually no! The important thing is to know some steps necessary to take a beautiful, studied photo that can give us satisfaction. For this reason, we have created a guide with 5 tips for taking a perfect photograph of the moon.
How to photograph the moon: the guide in 5 tips
With the photography of the night sky we technically enter the field of astrophotography, which certainly involves specific instrumentation, but as far as the moon is concerned, no particular technique is actually required, just some tools that certainly make the job easier and some good practices.
The weather and moon phases | How to photograph the moon, 5 tips
The first step is to study the weather forecast for the evening in advance and consequently also the phases of the moon. The ideal condition for photographing the moon is an evening dry, without humidity, with a cloudless sky and in a situation of no wind. If we are in a high altitude situation we can also enjoy a sky free of air pollution with the stars clearly visible surrounding our protagonist subject. Humidity can create quite thick and visible grain in our photos and clouds could obviously partially cover the moon or make it “foggy”. Even the wind, especially if strong, can create blurring problems and in the fourth tip, on manual settings, we will also discover the reason.
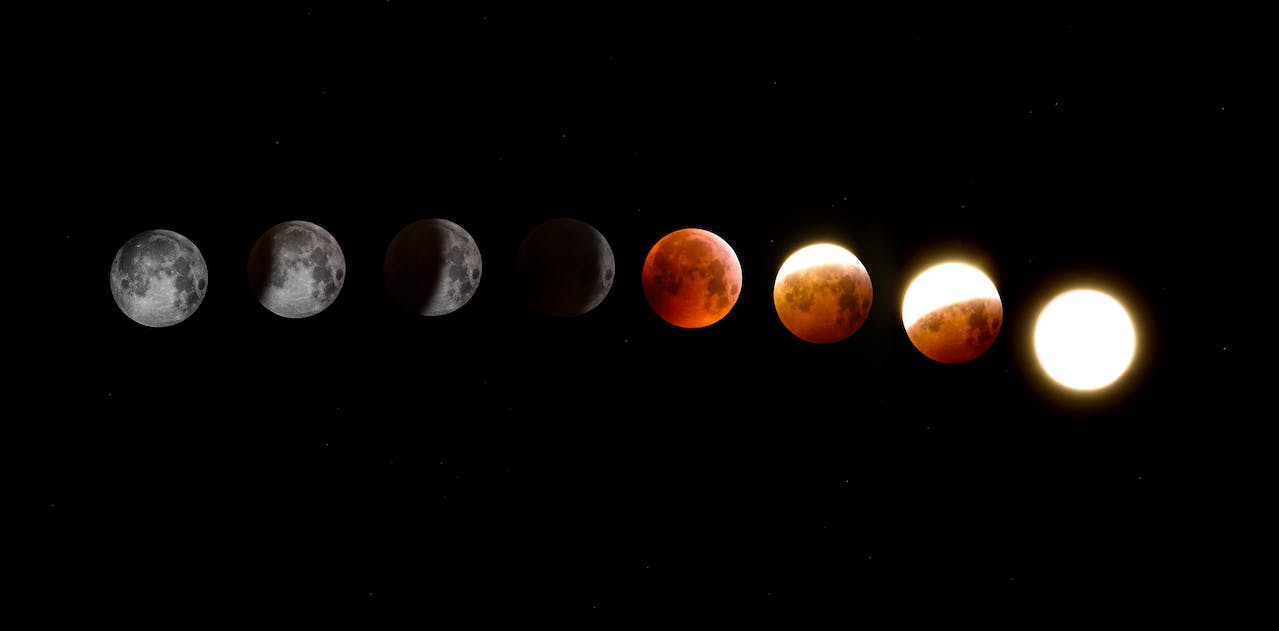
It is also essential to take a preventive look at the moments in which the moon rises and sets and consequently also what the lunar phases are expected for the day. So if we are faced with the first phase of the moon, New moon, we will not see anything, because it is hidden by the brightness of the sun, in the second phase, of Crescent moon, we will see a small segment of the moon, very characteristic to photograph. Then it follows the third phase, or the full Moon, in which the earth is exactly between the sun and the moon and we will be able to see a perfect, totally illuminated sphere. We then arrive at the fourth phase, of the waning Moon, which retraces the previous phases but in a mirror. To check these phases in advance, you can use weather apps, which are very convenient for many passionate photographers.
The telephoto lens | How to photograph the moon, 5 tips
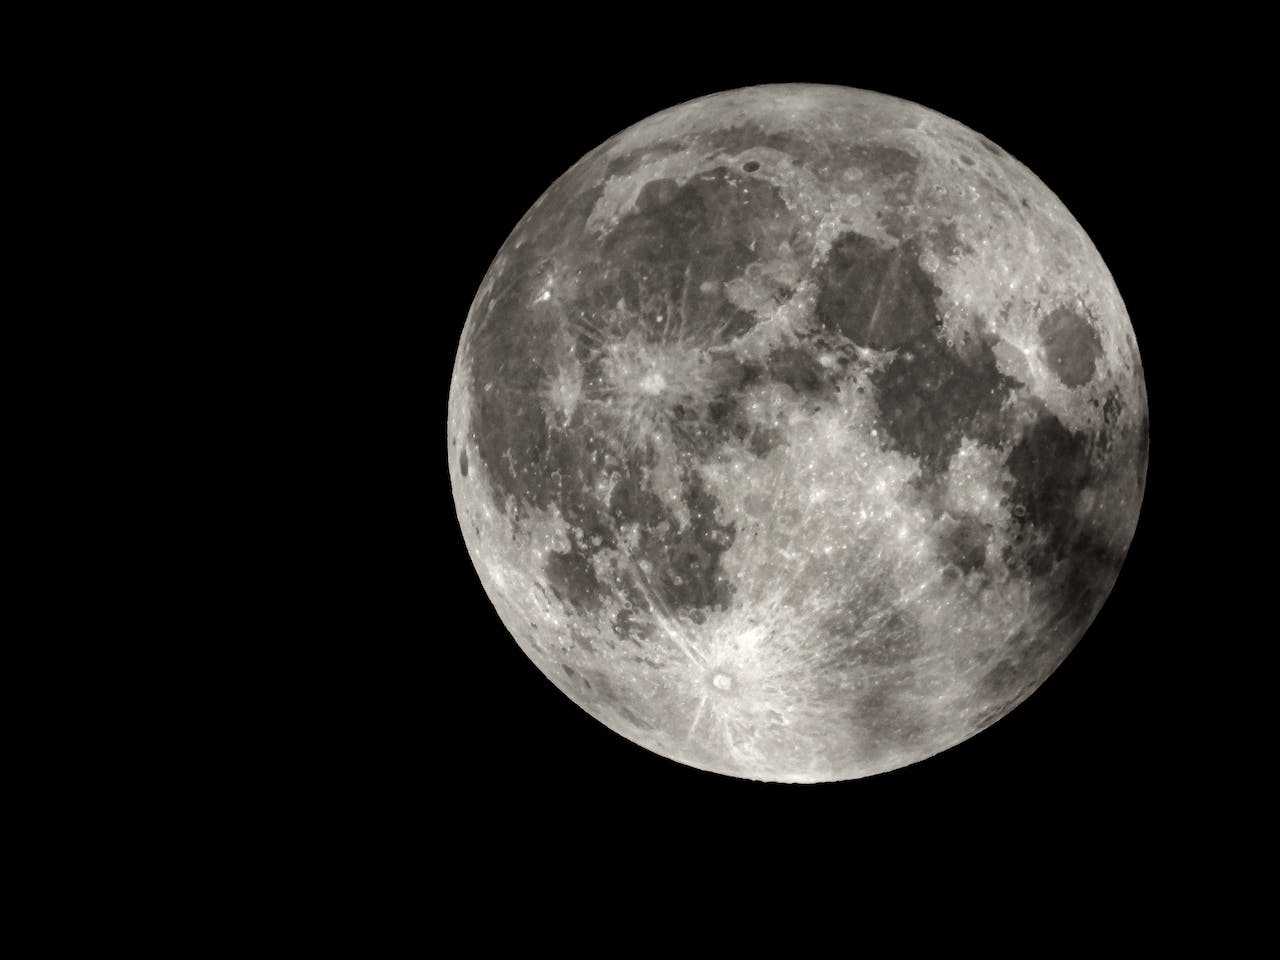
If it is true that you don’t need a lot of specific equipment to photograph the moon, there are two necessary tools and we can see one of these immediately and that is the telephoto lens. The moon is far away, we know it and for the camera it is even further away than our eye. For this reason, to photograph her in a way that does her justice, we need to get as close to her as possible, how? With a telephoto lens. So, we are talking about lenses of at least 100mm and obviously the more focal length we have available, the better it is for us. The ideal would be a 250/300 mm lens to be able to have more details, for example craters. As for the lens brightness, it is not necessary for photographing the moon, so therefore lenses with a particularly open aperture are not needed.

The easel | How to photograph the moon, 5 tips
Another tool that can be very useful, especially when faced with a telephoto lens mounted on the camera which often involves a lot of weight, is the tripod. To photograph the moon you don’t need long shutter speeds, but in any case the tripod helps us to have greater stability in order to avoid camera shake when shooting. Furthermore, it is convenient for us to use the live view screen for shooting preparation, which is preferable to the viewfinder, as it allows us to better control the sharpness.
Manual settings | How to photograph the moon, 5 tips
Once the instrumentation is there, we get to the manual settings of our machine. Here we see an overview of the classic manual settings and how to set them for a perfect shot.
Shooting times
You don’t need long times as we were saying, in fact the recommended times are around 1/100. The reason is also due to the fact that the moon moves, so very long times can cause motion to occur and in addition to that also the presence of wind, as we said in the point relating to weather conditions. Despite these not long times, the stand can still be used for greater stability.
Diaphragm
You don’t even need a particularly open diaphragm and this is excellent because it doesn’t have an economic impact on our telephoto lenses, which, as we know, cost more with a larger aperture diaphragm. The diaphragm, therefore, can be at F8, in order to have a good balance between brightness and depth of field. If you increase beyond F8, the brightness and sharpness of the main subject may suffer.
Iso
The ISOs it is advisable to keep them low, to avoid a noisy effect that could affect the sharpness of our photo of the moon. Furthermore, if the telephoto lens we have mounted on our camera manages to get close enough to the subject, the brightness comes from the moon itself. So, we recommend ISO at 100, maximum 200.
Focus
We have arrived at the focus: although it is usually kept automatic, to photograph the moon it is advisable to keep it manual, to be sure that our entire point of interest is in focus. From here, also the convenience of having the tripod, that is, with the camera mounted on the tripod, we can concentrate on finding focus. Currently we also have mirrorless cameras available with a truly advanced autofocus system, based on artificial intelligence that can help us in case we want to leave the automatic setting.

The perspective | How to photograph the moon, 5 tips
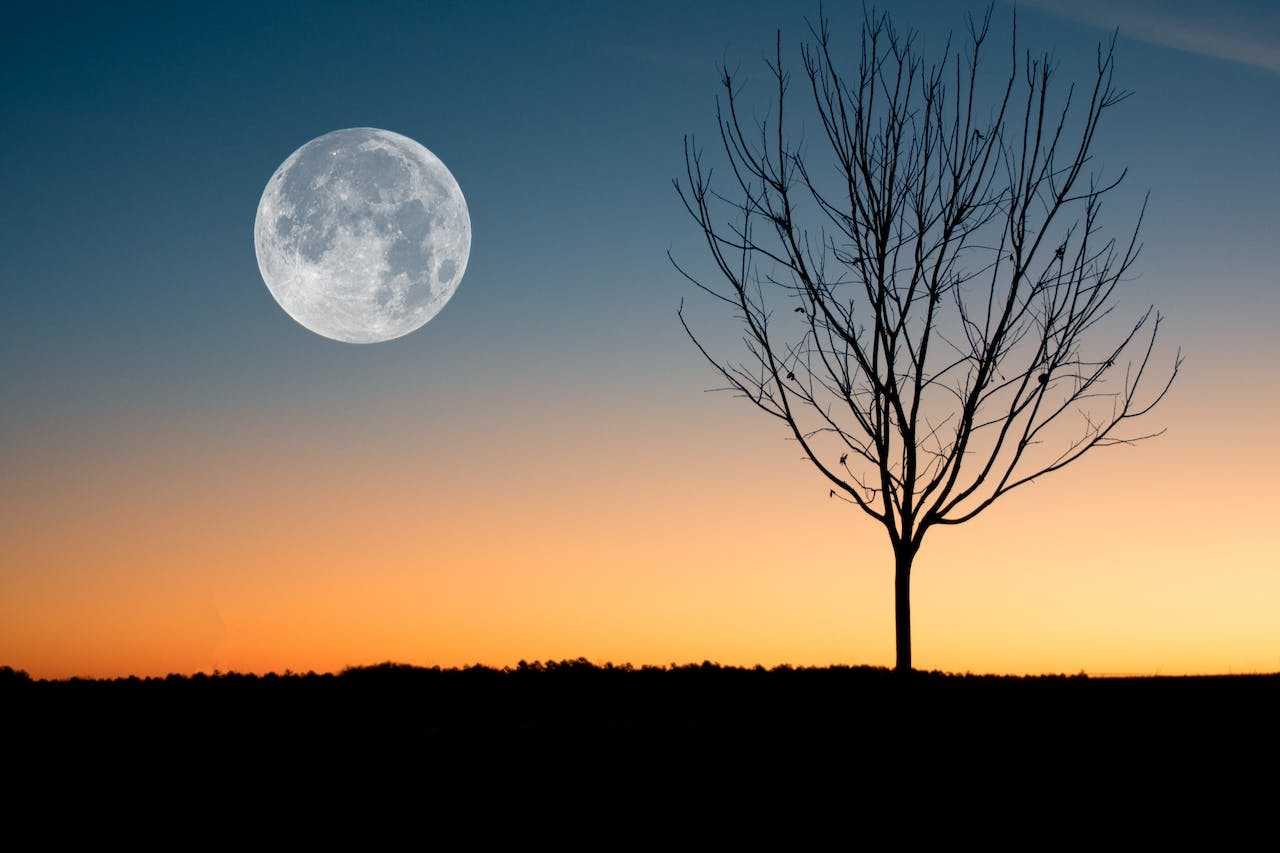
Once we have everything we need and we have also set up our camera, Here comes the fun part: creativity. That is, the moment in which we decide how to compose our photo and in what perspective we want to photograph the moon. As for the composition we can always rely on the good rule of thirds, which helps us position the moon in a certain portion of our space, therefore not necessarily in the center. We can decide to focus only on the moon, so if we have a telephoto lens with 250 mm focal length we can also make the craters visible, or we can play with the elements around us. At times when the moon is lower, for example when it rises or sets, we can use a perspective that involves the elements around ussuch as buildings or trees and therefore make our shot more interesting.
Conclusions
As you could read in these lines, photographing the moon is not difficult, it can be done with some practical and technical measures and can give us a lot of satisfaction. Obviously the advice we have given you can be a good starting point to then be able to experiment and unleash your creativity on the next moonlit nights. Let us know how your experiments go and continue to follow techgameworld.com for more photography tips.